Sunday, 21 April 2019

Hive inspection with Girls - 20190415

So now I have my own bee suit - this means I can use my in-laws two bee suits for the Girls
Which means they can both come and help with Bees


My 6year old - Katie was very pleased with her look! and quite excited!
Ready to head down, start the smoker, set up the video
then put on the head veils, tape wrists


So to the inspection details......

Number 1 hive
Finally found the queen - Thanks to Amy's good spotting (8 minutes into the video below)
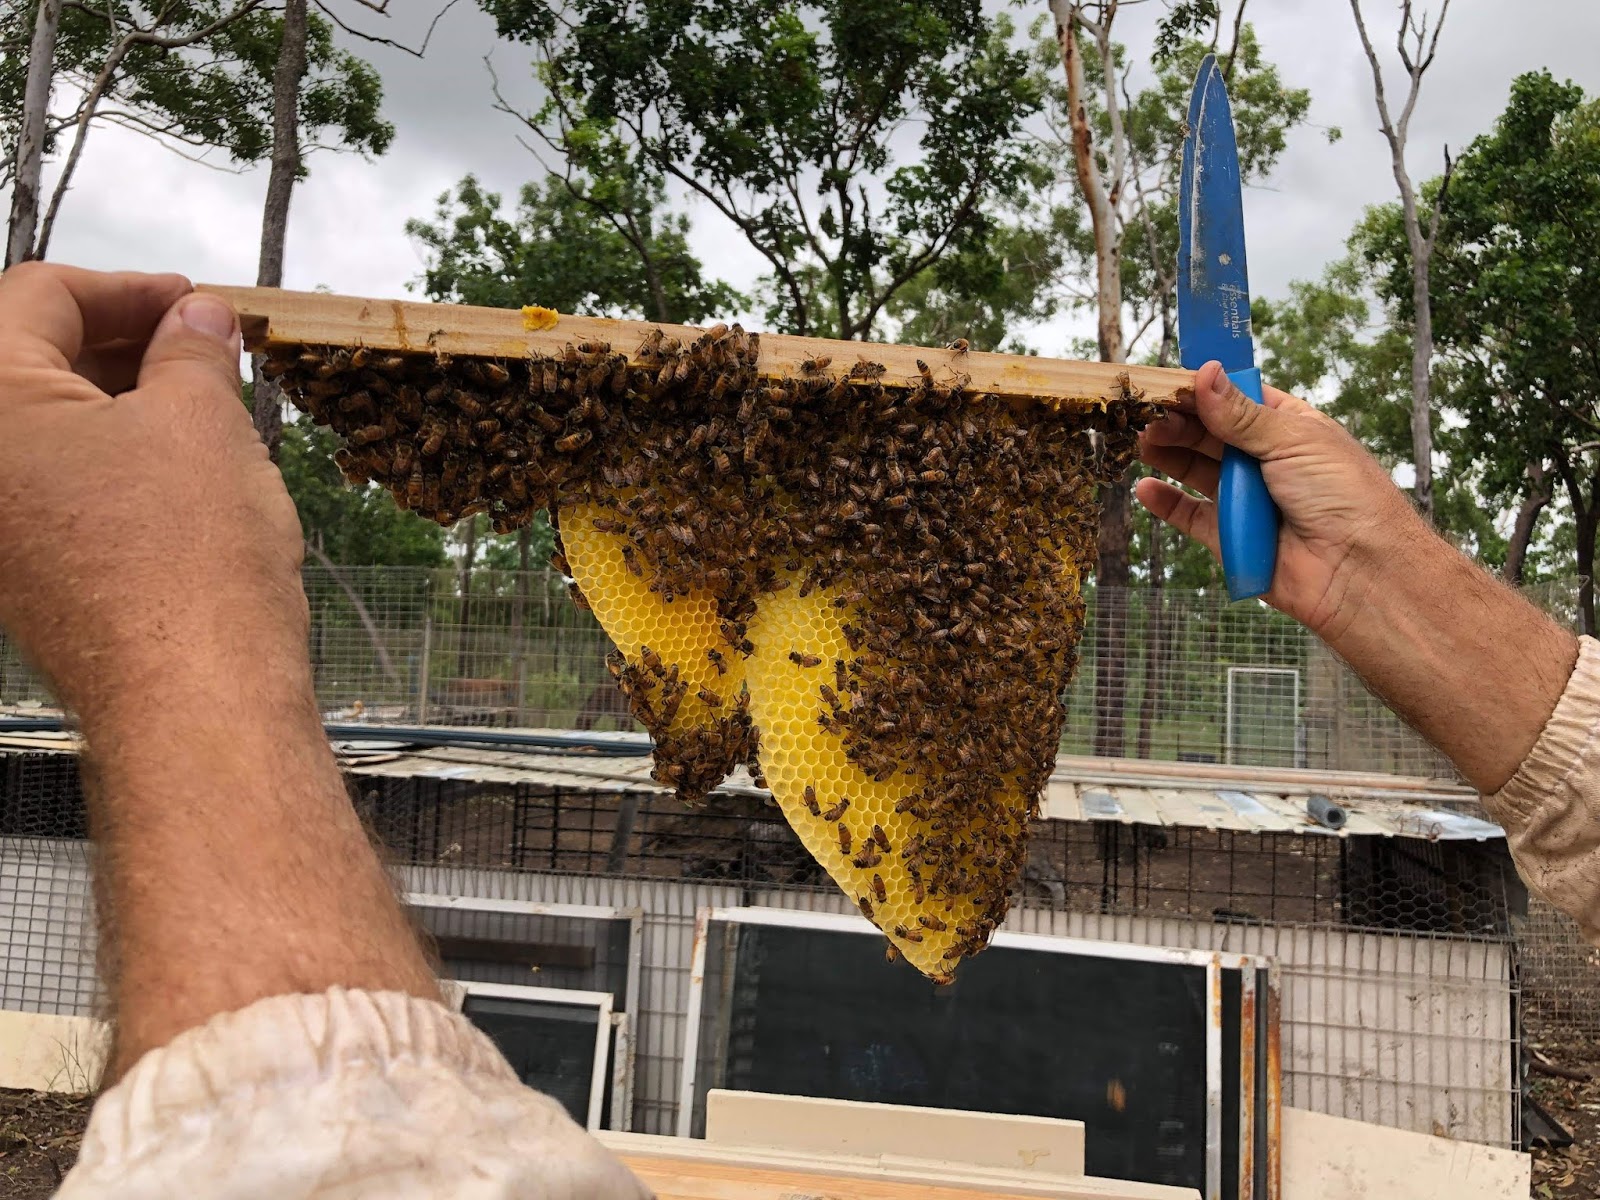
We found drone and worker cells and identified the difference
We found honey stores - uncapped but plenty of it
This means they have finally found some flowering trees - Melaleuca, I think starting to flower now the wet season has tapered off
The girls learnt lots, asked heaps of questions - had trouble with the dried horse poop i use for smoker fuel! likes it better when I topped up smoker with eucalyptus leaves

Number 2 hive
Doing much better, even has a little beard in the evening of bees hanging out the front of the hive
plenty of brood, plenty of honey - some even capped
starting to really fill out available space with comb

Even cut a small bit of honey comb out of one drawn comb for the wife, who loves honey in the comb (girls liked it too - it was a very light colour with no real significant taste or aromas)
The honey currently being stocked up is much darker
walking past the hives at night - the smell of rich honey is infectiously delicious!

Towards the end of the hive inspection Katie got stung through her gloves (she rubbed a bee off her hand and it retaliated) which shocked her a bit - but she handled it well and promised she would come and help next time despite the experience

Overall thought I had enough bees to split both hives but need to be patient for a while yet before I do that - uggghhh!

So very happy with the progress of both hives - but want more!

Hive inspection Video below has the girls asking heaps of questions
       - while I am a newbee too and still learning every day
             -  the answers to the girls questions might help some others, at the very least add some insight

Enjoy

Sunday, 10 March 2019

Hive inspection 20190309

So inspected my top bar beehives yesterday

The most active of the two hives  had been a bit aggressive with any 'nearness' to it lately and hadn't really got into it the last two inspections because of this

But a New bee suit - one of those triple layer breathelable types had arrived and it would make donning a beesuit here in tropics more bareable - so come what may this hive was getting a thorough inspection and the time it takes

My concerns of not inspecting hive for a while and now finding the topbars cross burred to the max were totally unfounded 

One small bit of burring and two queen cells on one piece of comb

The burring is fixed easily
And I took out the top bar with the queen cells and after checking for the queen took two more topbars with brood and all the bees attached - placing them all into one of my spare small topbar hives in the hope a queen will hatch and start a new hive

I sealed the hive and started substitute feeding it for a week or so when the queen cell should of hatched and taken over
An experiment but here's hoping!

Been a while since I messed about with bees at all so always learning

The first hive also had well formed straight combs 

And the bees hadn't reattached the comb to sides after first attempts at comb making three months ago 
While no queen spotted, heaps of brood cells plus lots drones and drone cells ( that last bit not always a good sign depending of your viewpoint) 
Not much honey in combs but a moderate amount of pollen in lower parts of the combs
The second hive has rarely been seen buzzing with activity during recent weeks but when opened had plenty capped honey, brood and plenty of young bees

Interestingly when so close to the big hive with its plethora of drones - having no drones at all. 

All its comb was mostly straight too
Still undecided about whether to put a new, more prolific queen in this hive .............
Was also thinking of splitting big hive and getting two new queens but now with queen cell experiment and full hive again - undecided 
If still heaps of drones next inspection maybe a new queen is needed

The wet up here is almost done and hoping local trees start flowering as not much other food sources happening 

Final comment with a verdict on the new beesuit that is positive given heat and humidity of the few hours working on bees. Much more bearable than heavy cotton version most use down south in cooler climes and I was using til I bought this aerated one. 
Keep loving those bees. 
NT TopBar Beekeeping

Friday, 1 February 2019

no bloom about - so bees struggling

Recently I transferred the 'post" hive into a large Top bar hive box - 15 bars into 30 bar box
Again I had a helper (oldest daughter just moved here to start teaching at my old school) who had a blast handling the bees and the "up close and personal" of a hive inspection.

We moved the old hive aside and placed the large hive box in to its place

Then we transferred the bars with comb on them across to the new hive box.


We did find the queen but her performance is definitely declining

Finally I shook the last few bees into the new hive

And we put the lid on and closed up the hive

During this shift we found absolutely no honey stores or pollen.

Falling rain stopped the inspection of the "Grass" hive - a bigger population of bees - active all the time.

For the next week the bees also hadn't found the entrance at the back of the hive box into the feeder station. So was hoping to get time to find a solution to this.

Home early from work one yesterday- and no one else home to distract me - I quickly got into my bee suit
I use a bee suit as I have a phobia of things buzzing about my head - this increases my anxiety which I guarantee the bees pick up on this! yes a phobia but love the bees!
I am far more efficient and confident with a suit on then with out it. I no longer use gloves but really like my good boots and ensure the cuffs of the bee suit are secure over them

Anyway this time I didn't wear boots, so my feet just had 'crocs' on (soft plastic shoes - look them up most comfortable shoes ever!) and thus the ankles were wide open to the elements and subsequently the bees - I was nervous even before I started stoking the smoker.

So, now into the solution for Post hive not accessing the feeder station
I removed 10 rear top bars and slide the rest of the bars with comb etc towards the rear of the large hive box. and placed the removed top bars towards the front. hope it works and doesn't effect the way the bees operate too much - this hive not the strongest - might have to replace the queen.

I also checked for cross burring of combs - some were very thick wider than the 32mm top bars I have (have plans to use a queen excluder and past this excluder some 40mm top bars for honey comb)

Again the lack or scarcity of honey or pollen stores was a concern - haven't seen any trees flowering for a while either.

The solution worked as within half an hour the post hive hod found the feeder station/

Next to the bigger hive for a check up

The bigger hive had its bees working up a frenzy from some source for a week but hardly a bee is seen returning with pollen on its legs recently. There is a "weed" in the horse paddocks the ladies are working but I am about it spray it with broad leaf weed killer - so even this source of food will expire shortly - the wet season so hard for bees up here in Darwin.

I then opened up the "Grass" hive - heaps of bees, a very strong hive in numbers
But for the first time I found them quite aggressive towards me
Was it lack of food - "hangry" (hungry-angry) bees??
Could have been the weather conditions in the late afternoon - about to rain, windy, hot!
Could have just been my anxiety of exposed ankles?

Found several cross comb areas - but pissed off bees and my nervousness ended the inspection before I looked at last 10 bars, those with the most bees and comb on them.
Need to get in there within a week as again lots of burring of comb and who knows what else
thankfully this hive cleans out the feeder station rapidly but they too had very little honey and pollen stores - some but not a lot

So more substitute feeding needed both hive - along these lines thinking of planting a 200m hedge of some sort of flowering plant (flowering Jasmine) along the outer edge of my rural block to help the dearth of local flowering trees

until next inspection
enjoy your bees!


Wednesday, 16 January 2019

New feeder being used

Meant to write this one up a while ago but didn't get my act together
Finally - here it is!

So used to have a feeder inside the hive box - but what a hassle to get into it!

lid off, and then into the top bars - which got the bees all excited - which meant at least a head net

So seeing I no longer use following boards - just not needed up here in tropics - cold weather not an issue while heat is - so more room to spread out when no following board.
No problem so far (I hope!)


So I made up a new style feeder station I could attach to back of hive and have easier access to
Just lift the lid and pour - yes a few bees about but minimal - see video at end of this blog entry

It is basically a box  - sadly often mistaken for a bird next box by the uniformed
Simple four sides, base and a hinged lid

I attach it with a few screws and it can be removed when not needed

I just cover the hole in the end of the hive box with a patch of tape when not in use


Inside a take away container fits perfectly into the bottom

Also is a piece of fly screen for the bees to have better access to the sugar syrup - and crawl onto if they unintentionally go for a swim in the syrup.

For one hive i had to use my finger and smear the syrup at the hole - but the other hive - they found it no problems

Now always a few bees hanging in there no matter if syrup present or not 


7 more hives made - digging myself deeper!

So school holidays currently - so bored - love my work as a teacher despite the majority of overtly self entitled students I attempt to teach - but long school breaks over xmas - uugggghhh!
But I also access to an empty school workshop and 3 sheets of packing material ply (one 19mm thick and the other two 7mm thick) - so why not make some hives!

Better still my son (a builder in Newcastle) and his partner were up visiting over the new year - so the work will be done easily with my experience and his expertise.

We cut the ply sheets (2.4 x1.2m) up into specified strip widths as per my sketches and ideas - like previous hives - key measurement is the topbar length as I made the length to also fit into a langstroth hive if needed (brother-in-law has 10+ langstroth hives).

We then use the cross cut saw to cut the angles for the end pieces cutting at around 22.5 degrees - the ply is 19mm thick on the ends. We ended up with a quadralateral shape - approximately 455mm across top, 180mm on the bottom, and 325 on the sides

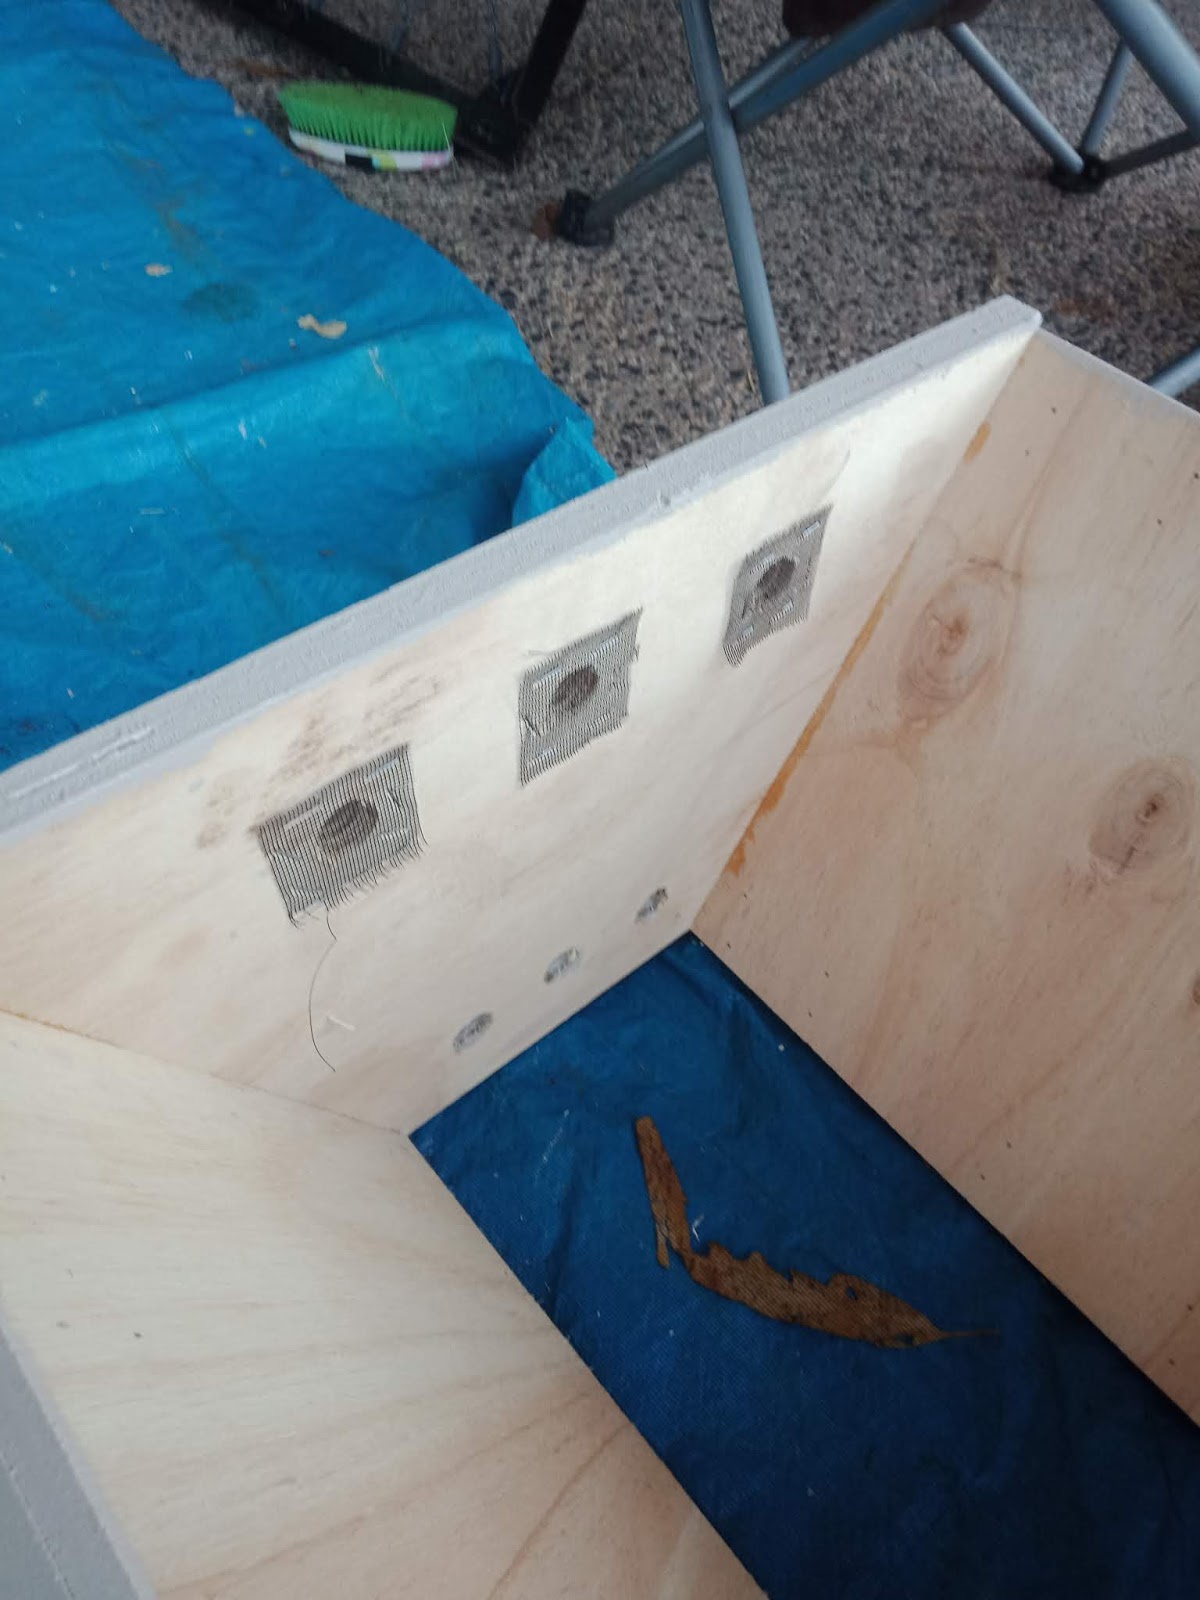
We use a 22mm spade bit to drill three entrance holes and three ventilation holes on the front piece

Then we use a piece of scrap timber to make a landing platform. Utilizing a large linisher sander to angle one edge so the platform slants away and down from the entrances
Attaching this with glue and a nail gun


We then glue the sizes to the ends and use an air brad gun to firmly attach before adding three screws each and and side. Although painted the image below shows a coupe of screws


The light ply available for the sides is only 7mm so the end product so far is a bit flexible

What to do?

Luckily another friend needed to get rid of some skirting board that they were replacing - awesome for me! We stripped down the skirting boards into two strips of 42mm x 19mm.

Gluing and brad nailing these to top and bottom of the sides - which firmed up everything nicely


Using an air staple gun we attach a strip of aluminium insect screen to the bottom and a patch of screen material to each ventilation hole in front piece


That's the hive base completed - except for painting
So here we are after three coats of Solarguard water based paint I had left over from painting my new house a year ago -

Laid each coating of this on really thick with a 100mm roller


Here are my awesome helpers with all the painting


I also made some (10 more) feeder stations that I have been testing. I originally had the feeder inside the large hives but too difficult to fill regularly.
So these ones attach to far end of the hive. I once used following boards in the large hives but now don't bother, which suits this feeder design. Now after several months, seeing no negative impact on the bees being in a large space.


So now I need to make the lids and top bars

For the lids - I have cut four 19x19mm strips of pine (from the old skirting boards I was given), cut two end pieces from 9mm ply I had extra from previous work - 40mm wider each side of hive base - so rain falls away from sides of hive base about 100mm tall, and some 3mm ply strips 1200x420mm (had to buy half of this material these sadly, got rest from local dump)
I drill a spade bit hole in apex of the triangle pieces for the lid for roof ventilation above the top bars  covering with a stapled insect screen patch on the inside to keep bugs out
I will then attach the squat triangle ends pieces (9mm scrap ply) to the strips of pine with a nail gun
Next add plenty of glue to the strips of pine and place on them the 3mm ply - then use an air staple gun to secure the ply - was quite liberal with my use of staples too
I will add a strip of angled metal overlapping the join area of the two pieces of 3mm ply to seal it off top of lid using gutter silicone to hold in place and make it water tight

Haven't found the timber that I will use for the 260 top bars I will need
Also thinking of making some queen excluder topbars - still researching this aspect

Last time I made top bars I had a heap of 75x50mm structural pine left over from building my house
That time for the top bars - I cut all the timber I had to size, then cut a groove in the bottom of the bar into which I inserted a 10mm strip of 3mm ply - dipping these into hot beeswax to encourage the bees to build their combs on it - nice and straight!

So might have to hunt around for some timber for those top bars with a night time worksite "visit"
Hope I get some by the time I start splitting hives later this year to make more hives using the new long hives just made.

Again like last build of hives - almost no money spent
And now I have heaps of hives to fill up with bees!


Tuesday, 15 January 2019

201901004-Hive inspection

Well four hives are now two
One fallen thus crushed hive  and one that didn't survive the move out of the kitchen cupboard

But the two remaining are still going - one "the Grass" hive is powering on, the "Fence Post" hive slowly slowly going

The son and his partner arrived for a visit over the new year break

Brad and Alanna did the usual tourist type things - but Alanna after reading my blog wanted to get at the bees herself

So we suited up and inspected the two hive
We set up the smoker and puffed away at the first hive

Opening up the hive always is high in expectation (and fear!) of what will be found - or not found! This is always a quiet hive - so I always fear nothing will be in it when I inspect it!


After the first bar is removed from the rear part of the hive and that first bit of new comb is seen - the fears and expectation settles.


We didn't find any honey stores or pollen - so the substitute feeding will need to continue


We found plenty of brood at all stages from eggs to hatching nymphs


Plenty of comb being made with most of the bars of this smaller


The front four bars were full combs to the maximum size available and had while not perfect - had good coverage of brood with only a few missing holes - i.e the queen is really doing her job well

Might be time to shift this Post hive into a larger hive


We also found the queen - and just in case you are worried I am not stabbing it - just pointing it out


We found a little cross comb but it was pushed back into shape and should be sorted


So although a slowly growing hive - it is still growing - woooohooo!

Now to the Grass Hive
This hive has three-quarter filled its 120cm length
Didn't find the queen but heaps of brood
But here too no stores of honey or pollen
We did notice a few arriving bees had pollen attached to legs - so some food coming in

See video below for a bit more on the Grass Hive inspection

Sunday, 18 November 2018

20181118 - Grass Hive transfer to larger TBH box

So our Grass Hive is flourishing.
So much so it now needs a move to a larger TBH box
Current box Grass Hive resides in had 15 top bars, while this larger one has 30 top bars - this is equivalent to a Langstroth brood box with two supers

Yes, the current box still a few top bars yet to be drawn out - but with so many bees hatching each day I want to ensure plenty of room for expansion - and hopefully early next year a future split (or two) to expand number of hives I look after

Need also to think about queen extruders - most naturalist (if i can say that) TBH keepers don't use them but my Langstroth background is biasing me!

So next I dug out one of my larger TBH boxes from storage made a few months ago
I added a couple of long pieces of pine underneath the box and attached these with coach bolts
These will stabilize the TBH box and secure it to the steel stand (no more fallen hives and crushed frame/bees for me!)


I then secured a removable feeder station into rear of TBH box
I have been substitute feeding the bees for two weeks but might not need it now as recent start of the wet season must have started some flowering as the bees coming back to the hive have loaded legs.


We (my daughters and I - one in bee suit, the other perched on  high position watching from a distance) opened up the old box, shifted it aside and transferred the top bars one by one, after an inspection of course. We again didn't see the queen but the host of nymphs and capped brood indicate the queen is busy doing what she should. Good brood groups on the comb too - as in no spotting of brood but full coverage on middle of comb - so she is really doing her job well.


Once larger TBH box was in the position of the original smaller TBH box, we checked the larger TBH box was level (so combs have more of chance to be drawn straight). Having the entrance of this larger TBH in the same place as the old box allows less stress for returning foraging/worker bees.

Most of the rest of the frames transferred - all had a little comb drawn if not three of them full combs filling all available space - awesomely full of brood, nearly all had honey stores. 
Only one frame has any capped honey but the plethora of brood holds well for this TBH's future.
Seems a very contented hive - very busy with bee life.

Had to add 5mm spacers around the honey comb top bars (2 of them) as the wax was drawn well beyond edge of the 32mm wide top bar. Some TBH keepers recommend two sizes of top bars 32mm for brood frames and 38mm for honey frames. Others go just 32 and some 38mm, as too all 32s and add in 5mm spacers when needed. This is where the queen excluder comes into it - - I am thinking 32mm at front of TBH and past the excluder - 38s for honey production. Will mull over this and other theories for a bit yet as not looking to harvest honey till Feb 2019 - if at all for 2019 while building up and splitting hives to increase TBH numbers.


So the hive was healthy and full, but now with a bit more space
The old medium sized TBH box all set up again - ready for next swarm or hive split