Starting some beehives for honey and wax in Tropical conditions of the Darwin Rural Region of NT Australia - so thought the Top-Bar method might suit local conditions. This blog is about this journey.
So our Grass Hive is flourishing.
So much so it now needs a move to a larger TBH box
Current box Grass Hive resides in had 15 top bars, while this larger one has 30 top bars - this is equivalent to a Langstroth brood box with two supers
Yes, the current box still a few top bars yet to be drawn out - but with so many bees hatching each day I want to ensure plenty of room for expansion - and hopefully early next year a future split (or two) to expand number of hives I look after
Need also to think about queen extruders - most naturalist (if i can say that) TBH keepers don't use them but my Langstroth background is biasing me!
So next I dug out one of my larger TBH boxes from storage made a few months ago
I added a couple of long pieces of pine underneath the box and attached these with coach bolts
These will stabilize the TBH box and secure it to the steel stand (no more fallen hives and crushed frame/bees for me!)
I then secured a removable feeder station into rear of TBH box
I have been substitute feeding the bees for two weeks but might not need it now as recent start of the wet season must have started some flowering as the bees coming back to the hive have loaded legs.
We (my daughters and I - one in bee suit, the other perched on high position watching from a distance) opened up the old box, shifted it aside and transferred the top bars one by one, after an inspection of course. We again didn't see the queen but the host of nymphs and capped brood indicate the queen is busy doing what she should. Good brood groups on the comb too - as in no spotting of brood but full coverage on middle of comb - so she is really doing her job well.
Once larger TBH box was in the position of the original smaller TBH box, we checked the larger TBH box was level (so combs have more of chance to be drawn straight). Having the entrance of this larger TBH in the same place as the old box allows less stress for returning foraging/worker bees.
Most of the rest of the frames transferred - all had a little comb drawn if not three of them full combs filling all available space - awesomely full of brood, nearly all had honey stores.
Only one frame has any capped honey but the plethora of brood holds well for this TBH's future.
Seems a very contented hive - very busy with bee life.
Had to add 5mm spacers around the honey comb top bars (2 of them) as the wax was drawn well beyond edge of the 32mm wide top bar. Some TBH keepers recommend two sizes of top bars 32mm for brood frames and 38mm for honey frames. Others go just 32 and some 38mm, as too all 32s and add in 5mm spacers when needed. This is where the queen excluder comes into it - - I am thinking 32mm at front of TBH and past the excluder - 38s for honey production. Will mull over this and other theories for a bit yet as not looking to harvest honey till Feb 2019 - if at all for 2019 while building up and splitting hives to increase TBH numbers.
So the hive was healthy and full, but now with a bit more space
The old medium sized TBH box all set up again - ready for next swarm or hive split
So three hives - 2 going great - one not so
Thinking of getting bees from hives doing well and ordering 5 new queens from QLD, posted to me express. Brother-in-law has had them mailed to him before so know it all works well.
This will expand rapidly my active TBH (Top Bar Hive) box count.
As I have 3 large sized "30 bar TBHs" (one in use) and 8x medium sized "15 bar TBHs" (2 in use) - I would like to have most of the TBHs filled with bees in the coming season of plenty round the wet season.
Then have a couple spare boxes for swarm captures in the build up to next wet season - but have more scrap timber to make more when needed. Then again if the medium TBHs get bees they will soon need larger TBHs - so more workshop time will be needed focused on larger TBHs I think.
It tends to snowball doesn't it !!!
Now to the hives I do have---
Hive #1
So my Cupboard Hive is struggling.
The "countless" bees I thought were there before the transfer ended up being a lot, lot less than I had seen two weeks prior to the transfer
I did find about 6+ queen cells - so a swarm or two might have taken place reducing bee numbers before I got to it
Last inspection of the Cupboard Hive - I found countless wax moth, few bees and no visible brood.
So I removed 8 frames of comb I had transferred from the cupboard (now totally moth ridden) but left two frames with some honey in them - so less for bees to defend and control.
The other ruined comb, I placed in a bag for freezing (and to kill the waxmoth larva) - this wax for a later time of wax extraction.
My other two medium sized "15 bar TBHs" are doing well - one very well
Not much food about, as at time of last inspection the comb showed almost no honey stores at all, which prompted me to substitute feed for last two weeks - (see previous inspection blog entry)
So have a couple of feed stations set up - these will eventually go into the back of the larger TBH boxes (30 bars) when I transfer the bees from the medium sized TBH boxes to a larger TBH boxes.
Hive #2
The Grass Hive (collected off clump of grass in a paddock - see Grass hive capture details) is going gang busters. Plenty of bees and at least 12 almost full combs out the 15 available. Plenty of brood and uncapped honey.
There is a constant freeway of bee traffic going in and out the entrances of this hive - plenty of honey stores (well after the substitute feeding anyway). Last inspect showed four full frames of brood surrounded by honey stores and about 8 half combs, as well as a few just starting to be drawn out
Still did not see the queen but ample evidence of her presence in all the developing and capped brood
Will shortly transfer all the frames etc into one of my 30 top bar TBH box to give them more space to expand. (blog entry on this soon)
Hive #3
The Post Hive (see - swarm capture details) is slowly developing. Last quick inspection after school with my daughter - showed plenty of brood capped and developing with stores of honey on edge of each comb. No full combs yet but getting there - 4 top bars almost fully drawn out and plenty of other top bars are starting to be drawn down with comb too. My daughter also got to see her first queen bee on the comb - she was so super excited!
Both medium sized TBHs had issues with crooked comb that was carefully massaged back into place. also reversed position in TBH box to see if that helps. I think my strip of 3ply down middle of top bar allows the bees to draw comb from either side not exactly in the middle - all of which adds to the crooked comb problem. may need to sharpen ply to a pointed edge
So what next??
New queens to house?, split other hives for bees for the new queens, pinch a few bees from brother-in-law and think I know where a wild hive is which will be heaps of extra bees for new hives.
As Shakespeare should have said had he been a TBH bee keeper "Once more unto the Top bar hive, dear friends, once more;"
or was it like the light brigade charging forward to certain doom
"into the valley of bee hives rode the intrepid TBH bee keeper - stingers to the left, stingers to the right!"
So time to inspect the topbar hives I have at home - one other hive (kitchen cupboard hive) still on the farm 20 minutes up the road. Inspecting it next week
The home bees have been in the hives 6 weeks now - originally sourced from swarm capture.
Last inspections found comb cells with honey, a touch of pollen but no brood and no queen spotted.
That last inspection was also when my largest hive took a tumble and crushed all the comb, brood and countless bees. a day or so later the rest took off.
So here we are two weeks later - will there be brood? is a queen present?
Well plenty of brood in both hives but almost no honey and zero pollen
Great to see brood of all sizes and plenty of comb
But will need to do some substitute feeding
Find below a 5min video clip on the events of the inspection - enjoy
So finally got the time and situation to start working on the Kitchen Cupboard hive
More than a year ago a swarm took up residence in an old kitchen cupboard thrown onto the farm junk pile
My in-laws who own the farm suggested I add the hive to my top bar hives - Yes please!!
Had to delay the transfer of this bee hive to a top bar hive due to picking of melons and so many workers going past the hive all day long
With the picking done and only two workers cleaning up the paddocks - my time had come
So with a very early start, I set up the bee vacuum connecting a couple of extension cords back along the farm road to the main shed. I stoked the smoker and then got into my bee suit.
I was going to go through the cupboard doors, but the top drawer the hive had started in wouldn't budge
Taking off the top of cupboard an old tyre and a box of junk I noticed the plywood that made up the top was separating. - awesome another access point. Worked out wonderfully (see video link below)
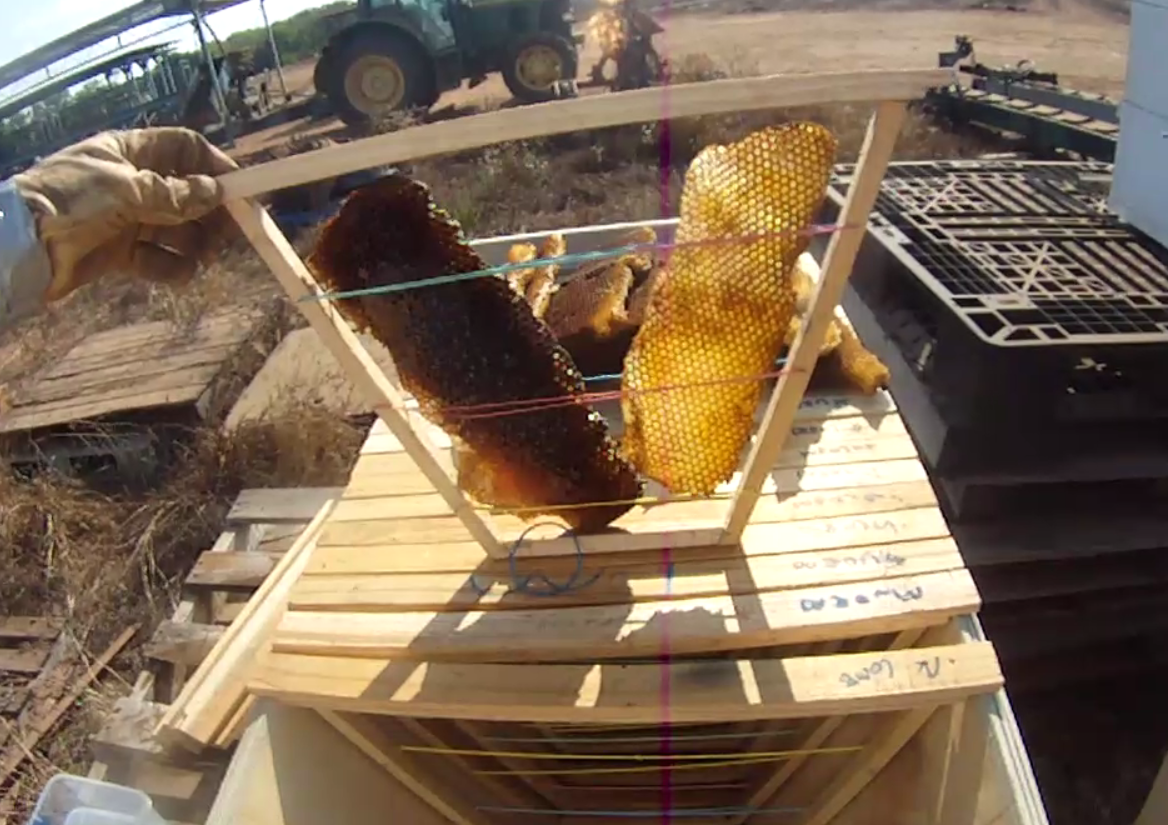
I started with the drawer, the comb would have been 10cm or so deep. Old comb, very dark comb from many uses by brood.
My style of holding the comb was different to most methods I researched - zip tied hair clips the most common.
Instead I added a wooden frame then a few strategically placed small nails and would hold the comb in place with rubber bands
Will it work?? Time will tell. These cheap rubber bands don't weather well but hopefully last long enough until the bees secure the comb to the frames
The comb from the drawer were not deep enough
So I put two into a frame but each was only caught by one set of rubber bands and was too loose.
So put the drawer combs on an angle which was more secure - but would the bees like it??????
The larger comb from the middle of the cupboard fit much better
Every comb removed revealled more bees which I vacuumed up hoping I got the queen and she was not damaged in any way
Once all the comb removed I placed the best pieces of comb into the frames previously made for the top bar hive
I them made sure the opening for the top bar hive was in a position as close as possible to the kitchen cupboards main entrance point. I secured the top bar hive to the pallets under it with a few screws and eventually a tie down.
I removed half the top bars so the bee vacuum box base would fit into the far end of the top bar hive, with all the supported comb towards the front of the hive box
As soon as I switched off the vacuum, I removed the vacuum pipe and taped over the input hole so the bees could not escape. Then placed it in the hive and removed the tape over the prime hole so bees could move into the area with the combs. I taped up an holes and gapes around the vacuum box
I had taped over the entrance holes of the hive proper but there were so many bees flying about I took it off. A few bees inspected the top bar hive entrances. So removed the tape hoping the bees would stay - I feel my chances of success are high, but.............
So started about 7:30am and was done by 9am - except for a bit of clean up
Popping back tomorrow to check on the hive - update to follow soon.
Here is a video of the key bits of today's efforts
So yesterday, sadly, one lot of bees went elsewhere - leaving only an empty hive
This was the hive that fell over in a gust of wind earlier this week - bees absolutely gone as if they never were!
And I got to watch it! (sorry no video)
I was checking my other two hives for brood (none still!) and it was like someone had thrown a switch as the hive bees began to just pour out of the three entrance holes like their lives depended on it and all took flight (still not sure if queen survived the fall but maybe so given this action)
The now swarm circled the area like a tornado and moved off toward the bush area at the back of my rural block, so very cool to watch but terrible at same time knowing I was losing a hive
Bugger!
I followed them as they moved away, they landed in a tall cycad tree - out of access and reach
I placed a scented hive box/swarm trap near them but next morning they were gone to parts unknown.
So now down to two hives
In the afternoon I popped down to in-laws farm and dived into their junk pile hoping for some items to build a hive stand for my remaining two hives
Found a suitable steel frame, that I levelled out as much as possible and tied my hives to this to ensure no more falling hives.
Lesson learned!
Tomorrow I will be starting my relocation of the farm's kitchen cupboard hive
However, my bee keeping confidence is shallowishly low given the last few negative bee incidents
Still jumping in the deep end of pool to learn swimming is what i have done since a kid.
Here we go!
Some background first - before brood and disaster details
So the in-laws had a couple of weak Langstroth NUCs they wanted me to look after
The father-in-law was worried about ants attacking the weak hive/NUCs
So he phoned me to take them to my place to see if I could help them
There was a lot of dead bees around the NUCs when I arrived - (maybe too much ant poison)
Once entrances taped up after dark, placed in the back of my ute, it was back to my place 20 minutes up the road. The next morning I removed the tape over the entrances and placed them for the day near my other bee hives as despite it being school holidays I had to pop into school for day to catch up on some ordering for my materials Design and digital design subjects I teach
but only a few bees exited the entrances once opened.
All day while doing paperwork - I was working out how to help the hives and incorporate them into the Top Bar style hive system
I decided to make a cradle to sit on top of the top bar hive to allow the NUC bees to incorporate into the top bar hive.
My youngest daughter helped me make it and a few lids for some medium sized top bar hives I have been making.
I added a feeder to the following board. Blogged about this previously how my feeder stations was made and why.
The four frames from the NUCs would fit into this cradle and be sealed in. See images hereabouts
Anyway - get home in afternoon - and the 8yr old daughter and I get into our beekeeping suits and start the process of transferring the NUC frames. We stoke our smoker and get it lighted. keen to help the NUCs
But no one home in either NUC but dead flies.
Found an empty queen cell, a couple of capped brood, and there was one frame of capped honey untouched
Very sad!
Why all the dead bees? - most likely the ant poison wafting into the NUCs
But then the real Disaster !!!!!!!
There was a bit of wind gusting about and all of sudden our best hive about 4 meters away with the most bees and comb - falls off its perch with another gust of wind - see video at end for consequences
Bugger to say the least!
I righted the hive and tried to save some comb but it was all too fresh (i.e. not hardened wax comb) and the jolt when the hive hit the ground damaged the comb and crushed countless bees Hopefully not the queen - could not see it amongst the crushed comb but not holding my breathe either
I found heaps of brood that I didn't see during the first hive inspection. so the queen was there before the fall.
Feeling quite upset at the whole thing - devastated. My 8 yr old more so.
I had been slowly re-orientating the hive to face the north so I could transfer the top bars to a large hive box.
Normally I would rest it against the crate it is near for extra support but it wasn't today - bugger!
Hopefully the queen survived and the hive recovers quickly
Updates soon!
This would not occur later as I was planning to place a steel post in the ground with a plate on top of it to screw the hive to. Much more secure but that is spilled milk now! No getting it back.
So have recently caught three swarms
The first two I have blogged about previously
The other one, the latest was a night time action in the grass Tuesday last week.
Grass Swarm capture details.
The Father-in-law was ripping up plastic in the melon field now picking has been completed and suddenly halfway up a row bees surrounded the tractor cabin
Once a distance away, an inspection back up the row, showed a swarm enveloping a lump of grass even after being disturbed by machinery
That was mid afternoon - took me till 8:30pm to get there due to a daughter's judo evening in town, so I was really hoping it would still be there, as other swarms have been found in afternoon but gone by the time I get there.
The previous swarms I have gotten to in time to capture, I had shaken into the hive boxes from higher positions than the hive box - but this swarm was so low to the ground that wasn't going to happen unless the laws of gravity change dramatically
What to do??
Maybe cut the clump of grass off at base and lift clump into a box - but this would really disturb the bees and I also didn't really want to put a bee suit on
So instead I cut the fly screen netting off the bottom of two medium sized hives I had placed out for swarm traps. Then placed them together base to base.
I replaced the top bar timber and lid on the top hive box and then placed the whole thing on top of the swarm as it clung to the lowest parts of the clump of grass. I also taped up one set of entrances and left the top hive box entrances open. Fortuitously ,the shape of the upside down top bar hive working like a funnel to the hive box above it.
The hope was the bees would work their way up the 'funnel' from the grass clump into the top hive - like what they see and make it their new home.
I also had a time/space issue as the in-laws needed the paddock the swarm was in the middle of, for prep work for next season asap - we are talking massive disc plows doing several passes across the entire field, then seeders for the wet season green manure crop. This while workers still here prior to rainy season when the dirt here turns to bottomless quicksand with the first rain to hit it - and once that happens no machinery can move in the fields!
When I arrived the next afternoon - all had gone to plan - awesome
Then I waited till just on dark when most of the bees would be inside the hive
I DUC taped the open entrances of the top hive box - so no bees could escape (or attack me!) Well, once I started fussing about with the boxes in prep to move them. I separated the two hive boxes - the bottom one was empty, so hoped all bees were in the top hive box. Once separated I placed a pre-made screened based to place the top hive box into and strapped - the lid, hive box and based together with a racket strap.
Too easy - well when everything goes according to plan anyway!
It won't always be so - almost guaranteed!
But currently "touch wood" - AWESOME! - three hives now and still I have not out laid any money for hives or bees!
Hive Inspection
So today two weeks after the first swarm was captured, I set about to inspect the hives
My daughter has designated herself my "right-hand helper" and wants to be in everything we do towards keeping bees. She even has been searching internet for her own bee keeping suit and loves a particular pink version. But maybe for Xmas
So for today's hive inspection, I placed her in a large suit big enough for me and taped up arms and other excess material of the suit.
Here we are ready to go beekeeping!
She was really pumped about getting near the bees after only looking over the fence at them for the last two weeks
The suit I borrowed for me is a bit small for me, so I tape up the ankles as they legs creep up and expose ankles to stings. While the sleeves end half way from elbow to wrist but my arms are so hairy not as great an issue
So off we go - hive tool, camera and smoker in hand
We looked at the Post hive first - this was the small swarm that was clinging to the top of a fence post.
Second top bar into inspection had a small piece of comb being built about the size of a dessert spoon but the next 7 top bars had comb 15-20cm across plus plenty of honey and the occasional orange flash of pollen in the comb.
Due to a perceived lack of local flowers (i.e. haven't seen any), I have been providing a feed for the three hives out of the one plastic take away dish with some sugar/water mixture but there was more honey stored in the comb than this mixture could have supplied. So the bees are gathering feed from somewhere despite this being the end of the dry season and not much growing or flowering vegetation around.
So #1 hive is small but growing - didn't see queen or brood in the several top bar's of comb which is sort of worrying
Next onto the "Fence" hive - this was the massive swarm clinging to fence wire and the weed growing over the wire. With the bees that stung me 30-40 times when I first tried to move them into hive box with me having no bee suit on.
Back to the inspection today....
Online info and research presumes that the new bees introduced to a top bar hive build comb from front bars towards the back of the hive. But this swarm has started building at back and worked way through to front. Later I might re-adjust the top-bars to do what most tell me should happen. I might actual transfer this large hive of bees into a large topbar hive, one with 30 topbars.
This hive has a large amount of bees and nearly every one of the 16 top bars has comb on it - a few almost full sized comb to fit the size and shape of the hive box. A bit of comb was attached to side but I scraped and shaped that to avoid issues later.
Again lots of honey in the comb and a few speckles of pollen.
But also only a brief glimpse of a queen (maybe) and no brood seen.
But plenty of comb, bees active - so hoping queen is in there - no brood again - a worry. If none by next inspection might have to really search hard for the queen on the comb and then if none - get a queen posted.
I was only going to inspect the first two hives but then decided to look at third even though only been five days since the swarm was captured.
It too has good numbers of bees, surprisingly plenty of comb with good quantities of honey and the now usual touches of pollen like the other two hives. but again I didn't spot the queen or brood.
So very pleased with my three hives so far - they seem very happy and calm while living in these hives so different form the Langstroth hives they left when they swarmed.
My daughter showed very good attitude to the bees - was in a way quite disappointed some bees didn't land on her gloved hands. it was a great introduction to handling the bees for her
Have videoed the whole process this time -
Find attached a shortened version focusing on my daughters actions (for her mum to show others). it is about two minutes long
The other clip below is a bar by bar version of each of the three hives examining each comb.
Next time I need to get camera closer to the comb - so sorry if not much up close detail.
So the father-in-law "suggested" a postponement of the relocation of the kitchen cupboard hive on his farm.
He is almost done for the melon season and the cupboard hive is on one of the farm's main thoroughfare roads. Add this to the strong wind all day and high temps - he suggested bees would be too aggro to be messed with. And workers wouldn't have to drive past the bees while hive being relocated.
I was about to mess with their very existence - the bees will be pissed no matter what!
But if father-in-law wants a delay - seeing I am married to his daughter - he gets want he wants. I fully understand the workers not wanting to be around aggro bees. Looks like we will wait til the harvest is over.
Earlier in the day I messed with some top bars to get them ready for the brood comb I would be cutting out of the cupboard.
I added some supportive timber bars, a few panel pins to both sides for stringing rubber bands across
I will place the comb across the rubber bands and add more to hold them from the other side. Didn't really like the method using zip ties and hair clips some online recommend. I gave all the top bars i made a week ago with a light brushing of beeswax.
There was no wind at my place 20 minutes away so quite disappointed I would not be getting into the cupboard hive - so I took all my gear just in case I could get at the cupboard hive after workers done for the day and if wind backed off (it didn't and in-laws far to stressed with dumb ass back packer workers to be talked into letting me get at hive).
I also took a couple of medium hives in case of swarming bees or simple to be baited with lemongrass oil and set out as swarm traps
Well didn't see any swarms, so found a tree just right to sit the two medium top bar hives on as level as possible. The tree is about 30m from 10 commercial hives that were damaged by a tractor boom about four weeks ago. I then took my lemongrass oil and added a drop or two to a cotton bud, rubbed the entrances with it then flicked the cotton bud through an entrance opening into the hive - as per the internet research I completed
While placing the hives securely in place, my mate Andrew, along to help with the cupboard hive relocation that didn't happen, spotted high in the trees above our location a large swarm. If I had a fire ladder I could have reached it - but not today. In the image below, that large dark triangle like shape with a couple of dead tree branches protruding out of it is actual a large swarm high up in a gum tree.
The sun was just above the horizon and dipping fast so they might stay there for the night. Hopefully in the morning after a night hanging in the top of a 25-30m tree when the swarm sends out some scout bees looking for a new home they find one of my two medium hives all scented beautifully with lemongrass oil, with top bar frames lightly dipped in beewax - a perfect place for their new home.
The father-in-law has totally pooh-hooooed the lemongrass idea as he does the top bar hive concept - so hoping the scenting of the swarm trap (my medium hives) works a treat to prove my online research. if it works - yahooo! If it doesn't not much effort to at least try.
My two swarms gathered the other day are very busy working the top bars of their hives - already some small comb being built off the top bars only days after being placed in them. I am able to have a good look in the hive without any beekeeping suit given how calm both hives are. Exciting times! Three cheers for the Top Bar Hive concept.
(plus so far have only spent money on buying a couple of smokers and the tiniest vial of lemongrass oil).
Another plus for the top bar design is that all the commercial hives on the melon farm in the heat of today had very full beards of bees hanging off the front entrances - while my hive had all their bees inside - so a much better design for 35 degree plus weather of the last few days. So am thinking the Top Bar hive concept is perfect for the tropical condition in Darwin but time will tell as always. Question is how will they handle 4 months of torrential rain and the month or two month long "build up" and its high humidity and temperatures. Can't wait to find out!
So I have my three big 30 bar Top BAR hives made and am painting them on the front carport.
Wife's car relegated to the uncovered area - dirty looks in my direction ensuing of course .
The large hives are looking quite nice - one all ready for the kitchen cupboard hive transfer
A few days ago my mother-in-law late in the afternoon calls and tells me she has a swarm sitting on a post.
But I just didn't have anything but the large hives to capture it and the bee vacuum would not work in the middle of a field almost a kilometre from a power point (think I will borrow a mate's mini generator next time - maybe?? which would solve the issue)
Bugger! Missed a swarm! Free bees!
So I started making up some 15 bar deepTop bar hives in the school work shop - half the size of my big hives. I had a couple of bits of ply in my shed that would most likely be appropriate in size for the task. once cut up I had enough for seven smaller hives.
Isn't that just bee keeping - start with one or two then before you know (two weeks time for me) you have 10 hives (3 large and 7 medium-sized top bar hives)
So due to possibility of more swarms - two days ago I took the first two of these medium-sized hives home to start painting them for the next swarm phone call I might get
Out of the big hives - only one been painted with three coats of the paint left over from painting outside of my house
Note: not oil based but it did allow me to still not spend any money on the hives - and I have a 15 litre bucket of it!
Today as I was getting chook food and horse food on the way home from work - again the mother-in-law calls - "a swarm on the top of a fence post" - awesome! I will be there asap.
So I go home first (basically on the way) and drop off all the bags of animal food total over-flowing my ute tray area - and the two more unpainted small hives I had put together at lunch break today I had planned to start painting that evening.
.
I then pick up one of the two painted medium-sized hives I had been layering with paint the last two days - plus 15 top bars for it and off I go a further 20 minutes down the road to the melon farm
Sadly I hadn't had the time yet to coat with beeswax on the bottom of the top bars - that was happening tomorrow or Sunday morning. Much better with smidgen of beeswax on top bar for acceptance by the bees - but couldn't be helped.
When I arrive at the melon farm - I drove straight past the fence post swarm. Missed it totally - it was only about the size of two fists (maybe three) together - a lot smaller than I had expected in hindsight
When I arrived my mother-in-law was doing her evening bird watch (driving away thousands of cockatoos that take a small bite out of a melon in turn ruining it for market). I drove to her and she pointed me right back where I had drove passed to find the swarm.
On my return to an area between two banks of of hired commercial hives (for pollination services) along a fence line, I spy a huge swarm low to ground in & on the fence line and the weeds growing around it. Looks like there are two swarms today - one huge and one small.
Bugger I didn't think to take a photo or video the process till after !!!!
Here is the fence post the small swarm was hanging off - only a couple of stragglers left now!
I had not yet put on a beekeeper's suit rather had on just my work clothes - as swarms are usually calm and fully of honey that they had eaten before leaving their old hive to sustain them while searching for a new hive site.- no need to suit up (hopefully! but sadly wrong!)
There are plenty of bees buzzing about as I place the small top bar box with no bars in it, next to the fence and tilted the edge of it till it was under and next to the lowest part of the fence and the swarm clinging to it. I give the fence a jolt and half the swarm falls into the hive box.
Instantly the bees attack me - I run and scream off 40m or so (no not really but wanted to!) and even 40m away form swarm still I am getting stung - 20-30 times at least - very pissed off bees. I head back to farm house and borrow a bee suit - then straight back to the big swarm. This time finally noticing the small swarm still on the top of the metal fence post. Father-in-law suggest that the big swarm were aggressive due to most likely being a swarm for a few days and running out of food and thus pissed off at anything!
Now fully suited but the aggro bees are all over the box and not me! About half are still on the fence and I replace the hive box under them and give it another shake - the majority are now in the new hive box. I had closed the the entrances on the box but now opened them to allow excess bees that didn't get in the box during the shake to enter the hive.
Some advise to close extra entrances so bees new to a box don't have to do much guarding but with so many bees in this swarm - not needed. So, I remove the duc tape from entrances - maybe the swarm will take off maybe not time will tell. I place the hive box on an old plastic banana box to raise it off the ground and allow ventilation to work more effectively.
I now go to investigate second swarm - the one I was called about an hour or so earlier that afternoon.
Now I had no more boxes - what to do.
I head back to farm house and search around. The brother-in-law had two Langstroth NUCs which would have work wonderfully - but the previous weekend we had due to a hive with several queen cells developing had placed a few frames of brood that had queen cells on them into each NUC boxes. So they were out for today's use. I finally grab a simple large plastic storage container and lid - then headed back to other side of farm.
The large swarm was settling in nicely into its new home. Much calmer now, as I was able to lift a few top bars to check out what was happening inside and bees didn't attack me at all - even pushed a few bees around to reorganize the top bars more effectively.
The top bars seems to not fit the medium-sized hive I brought with me - but later realize it was the bit of ply under the top bars protruding too far and touching the sides of the box - my pocket knife quickly solved that issue with a precise trim.
The small swarm was quickly shaken into the plastic box with a whack on the fence post about half way up and with the fence post leaning over - the bees dropped straight into the storage box - but it wouldn't do for a long term holding area due to evening heat of 32+ degrees and no ventilation holes. What to do -----
So I take off the access panel of the bee vacuum I had also brought from home and after tapping the plastic storage box on ground to concentrate the bees in a corner of the storage box - then I poured them into the back of the bee vacuum. Then replace the access panel. Too easy, if a bit of fussing around - still it got done. But unavoidably a few hundred bees are still flying about that didn't make it in the shake with the queen and were later found clinging to the outside of the bee vacuum - indicating the queen was more likely to be in the holding area.
I finally get the camera out and take a few photos - reminding my self to get camera out from the start of the swarm capture process next time. I blame it on "buck fever" - man I was keen to get those swarms - and it was sooooo much fun!!! I was giddely giggling to myself the whole time with the exciting time I was having messing about with the bees!
I left the large swarm at the farm (hoping they haven't taken off by Sunday when I am back at the farm for the kitchen cupboard hive transfer). I robbed a comb of honey from the kitchen cupboard hive to give the large swarm some food an incentive to stay in their new home.
I brought the small swarm back home to my place to transfer from bee vacuum into the second medium-sized hive I had left at home. I fluffed around a fair bit transferring bees due to my inexperience but eventually the small swarm was introduced to their new home for the next few months.
This is the small swarm back at my rural block the next day.The bee vac is open to let the last of bees I could shake out of it to make their way to the hive and the queen now inside the hive.
So far all good!
Here is a bit of video I did after all the capturing etc.
Now bring on the kitchen cupboard hive transfer! Got a mate, Andrew, coming to help me out with vacuuming bees and transferring comb - help with filming too.
When my brother in law suggest it - I said "WHAT?" - My first thought was he was joking
but he wasn't
After more time searching the net I came up the way I would do it to suit my conditions and top bar hives - Bee vacuuming NT Top Bar Beehive Australia style
Context please -
The hive I am shortly going to relocate into one of my top bar hives is currently in an old kitchen cupboard on a farm junk pile - it has easily 40 thousand or more bees which will not appreciate my shifting of brood combs etc to elsewhere. Better with most of the bees in a box while the operation takes place. A bee vacuum will put them in the box safely away form me working on the hive comb
Here is my initial sketches, design aspects and ideas based on hours of research on the web
Basically the need is if you use a vacuum straight to the bees - they would splat and spin all around the vacuum bin.
So you need a middle man - in this case a box between the vacuum proper and the swarm or hive. This allows the bees to have a holding area with no massive air movement
Most of the bee vacuum examples out there use a bucket or a Langstroth super box as this 'middle man'. However, I also wanted the holding area to be placed in my top bar hive to allow the bee access to the moved comb once all in place from the back of top bar hive and they can settle in with the comb rather than be shaken out of the holding box forcefully (more agitated bees!) like some videos show, same when having bought a box of bees and placing (shaking) the bees into a new hive.
So I designed the box purposefully to fit right into the hives I had made previously - once bees collected and comb relocated
It also has a observation panel (perspex) to check bees are 'ok' during 'vacuuming' - and if there is a capacity issue for so many bees (might see queen too if lucky too)
It additionally has an access panel - a late inclusion I had to cut into the box after it was made - poor design planning indeed! - my students would be mortified at my error in my construction plan although remembered eventually.
There is a sliding panel over the input hole to stop the bees escaping once all "sucked" into the holding box
There is aluminium netting over the top to ensure the bees can't escape once "sucked' into the holding box
The top box (removable) is just there to diffuse the air pressure. On top of it is also a valve to release vacuum sucking pressure - if needed when too much pressure for the bees (splatter factor elimination and minimization!)
There is a weather strip is placed between the two box to create a seal
And finally the whole lot is held together with a ratchet strap for while vacuuming and transport
after you add wet/dry vacuum and a couple of really long extension cords for power - Then you are ready to go swarm collecting!
Given I have made the hives, made the feeder station following boards, now made the bee vacuum - The Next blog entry - will be the relocation of Kitchen cupboard hive to my first Top Bar Hive
Scary and enticing all at the same time
Can hardly wait to get into my bee suit and get at it!
I will video all the action to come! So exciting!
Oh bugger - need to paint everything first - but no blog entry about that too boring!
When you gather a swarm or get a nuc of bees they don't need as much room as a productive hive
They might only a need four to six top bars to start with- this means the rest of the space in a metre long hive (like I have made) is just too much for them to guard and work in
So the suggested solution put forward by the top bar boffins on the web is a following bar
This is a top bar with a wooden panel to partition off the rest of the hive. The hive grows and needs more space - the bee keeper slides the following board back and inserts a few more top bars in the main section of the hive.
I also wanted to add a 'no drown' feeder station to the following board. This as most newly gathered hives or weak hives or maybe when honey flow and flower numbers are low - will benefit from a bit of feeding. (sugar/water mixture)
This 'following board' design is very simple, cut a panel to exactly fit the inside of the hive and attach it to a top bar. That's it. So simple. Again after much research online
Again I had my plethora of helpers today. They had enjoyed themselves so much last time, that they were banging at the door to help out again within minutes of lunch starting (students not out of uniform per say as we were having a fund raising day for sepsis prevention)
The image on right shows the hole for bee access to the feeding platform from within the hive.
As I wanted to be able to refill the feeding container without having bees fly at me and bees having access to the rear of the hive before they need to - I would have to build a funnel or tunnel to the feeding area that the best couldn't escape from
I also wanted to be able to remove the feeder access when needed.
So I built a little scrap plywood frame then stapled on some aluminium netting so that the bees could use to crawl out of the feeding liquid if they fall in. I build a wooden slot for it to fit in as well so it would move about.
The image below is what I came up with - the device can be held in place with a rubber band if needed as well. The foot of feeder apparatus (all wire) sits in a take away container of sugar/water syrup
Again as I am no expert or creative genius (just ask my wife! she handles that side of my life!!!), this apparatus is an amalgamation of a bit of this and a bit of that from several videos online.
So now we have one for each hive previously made
We shall see if it does the job and modify if necessary if it doesn't
Next blog entry will be the construction of a bee vacuum - "what?" may you ask
Yes, a bee vacuum!
This will be built to help with the transfer of the farm kitchen cupboard hive into a top bar hive - which has about 10 or so combs of brood I want to save if possible and about 40-60 thousand bees I don't want buzzing about as I remove their home from the cupboard and placed in my top bar hive.
Later I can use the bee vacuum for swarm capture - using long hose sucking up a swarm out of a high tree maybe!
Exciting times ahead - will video the eventual removal and transfer of the cupboard comb and bees - and the vacuuming of course
Most wouldn't or at the very least be hesitant to begin. However I have a few woodworking skills after a few decades of building almost everything "wood" I needed in life. Add to this teaching 100s and 100s of kids to do the same over the last 10 years as a materials technology and design teacher.
So making some hives, even Langstroth style would not be a problem for me given the equipment I have available. As for Langstroth hives - the making of a few custom jigs for table saws, mitre saws and routers would eliminate the issue of ensuring all parts exactly the same and precise.
But the cost and materials needed for some Langstroth hives were definitely beyond my current moth eaten wallet. So a Top Bar hive was to made this time.
But never one to make just one of anything -
My first goal was to make three hives!
The second goal was to spend almost no money doing so
For the materials, I had one 2400x1200x16 sheet of ply and plenty off-cuts from student projects. along with a heap of 3x2 pine I could cut to size and I was ready to go.
Firstly, I cut the sides and attached to a couple of purposefully shaped ends, then used a hole saw to cut the desired holes in all the right places - some for entrance holes others for ventilation
This was all glued and screwed together to increase indestructibility
I made the hives with gaps in base for ventilation through stapling aluminium netting over the base.
I also went for the access holes on one end (rather than the side like most I researched), same as the ventilation holes and a landing platform all being on one end of hive.
These three key design features and their locations where ones I picked up during my research and thus incorporated into my design - the logic of it seemed more insightful
The holes in the front allow expansion of the hive into the depth of the hive rather than expanding side ways. maybe pedantic but....
The ventilation holes at top of front panel I am told stop the bees building in the front top bar - but time will tell. the logic of this argument was lacking rational and supportive evidences but I felt why not! A gut feel it should work.
Another key design criteria was the width of the top bars being equal to a Langstroth bar so I can swap bars from mine to a Langstroth if needed (but the frame of Langstroth wont go other way due to rectangular shape)
Making these at my school's workshop had all sorts of student visitors during lunch times.
But all had the same questions
What is it?
Why that shape?
How's it work?
Why you doing it?
etc etc etc
I answered them all, showed some my design drawings and a few videos for the keen ones
Though my answers might of converted a few towards bee keeping
Even though I had to put up with all the questioning - it did get me heaps of volunteers to help
Especially the making of the 120 plus top bars
It was all a bit Tom Sawyerish (you know the Mark Twain story when Tom Sawyer was painting a fence and his mates ended up paying him for the privilege of doing his work for him!)
For me, at one stage I had 15 or so students gluing and tapping the ply into the slot I had cut earlier with a table saw on the bottom of the top bars
So instead of taking several days to complete by myself in between classes - it was done in under 20 minutes - awesome!
I designed the Top Bars to have a notch each end to stop the bars sliding off the top
I also cut a saw blade width slot in the bottom of each top bar and inserted a narrow strip of 3mm ply for the bees to attached their comb to
Later I will impregnate these strips with beeswax to encourage the bees to build their honeycomb on it
Next made were the lids
For these I cut some triangles for the ends, ripped up a couple of 3x2 pine studs to make four length basically 32x19mm or close to it - ripped off each side then cut/split down the middle the central piece left over form first two cuts and then used drop saw to cut all four to length of hive
A nail gun quickly attached these, then some glued 3mm ply on to the timber between the ends and finally used a staple gun finished off by pinning the lids to the timber
I placed a piece of Ply on each end of the hive to stop the lids sliding off.
So far the 3 hives have cost me nothing but time, the ply was a free packing sheet for 30 other ply sheets ordered for student projects, some off cuts from projects and the 3x2 pine for lids and top bars was left over from my rural house being built. the tools etc were already on hand.
The exact size and measurements are unimportant rather the function was more of a design criteria. The actual size of these hives was based on the materials I had on hand. Given a different sheet of ply and I might have made it different.
Each hive holds thirty top bars, and a feeder/following bar for the growing hive. That's the same number of frames as a Langstroth brooder box with two supers.
They are just over a metre long - and with nothing in them quite light. But robust enough to lift once a few combs have filled the space - well hopefully.
Now just a paint job on all exteriors needed - can't avoid spending money on that as the better the paint job the longer the hives will survive the harsh weather conditions here in the Top End - but then I could have more fun making a few more. (using an oil based paint for this is a must given the extreme humidity for four to five months of the year up here)
Next blog will be about building some feed supplement sections using a 'following' board.
Eventually I also have to make a few swarm traps, a couple of nucs and then weld up a few single post metal hive stands to concrete into the ground. I will screw the hives to these to secure them. To begin with I will place them on levelled old school table frames (more free stuff from junk pile at school!) These stands will have to be absolutely level to ensure straight comb making by the bees.
Until the next blog - maybe you do some research - maybe get into bees your self!
the breeding cycle and idiosyncrasies of how bees do what they do is fascinating!
Maybe find some scrap timber and build a top bar hive yourself
This journey has taken a long
time to get any real bees in hand so to speak.
My in-laws have a melon farm
just out of Darwin NT Australia - for pollination of the seedless melons it
takes a lot of bees - this due to the melons having a small pollination window
in the middle of the day - when bees are less active.
So to ensure good pollination for their melons they hire a lot of bees each
year. This costs several tens of thousands of dollars each year. The quality of bees, hives and the guys who look after them varies
greatly. So there are always bees swarming - mostly due to cramped conditions from no one checking on them for several
weeks at a time.
However, we can go back even further for reasons to get into bees. As ten years ago while still living in Sydney I did a
commercial bee keeping course in the south of Sydney in prep for when moving up here to the NT and maybe one day keeping the pollination fees in the family. But since that time - two kids, a house being built, 5 acres being cleared for horses and other animals. Then there are careers being consolidated. a master degree completed, and the rest of life's hobbies (I fly fish a
lot up here) and those every day instances - all of which have kept this idea of commercial beekeeping or even hobby bee keeping on
the bottom end of the "to do" list. Recently things are settling
into a nice groove in my life and I was looking for something else to do. And here we are today. Although there are other
farmers around who need pollination services, the in-laws are almost retired,
and I am only 10 years from it myself. So not the time to start a new career
path of becoming a commercial pollination service - as we are talking a couple of hundred hives and then some. In the positive really only one guy doing this service currently - so maybe there is a market for it.
But from a hobby perspective -
why not! The honey and wax would definitely not go to waste. More importantly
before the in-laws stop hiring hives for pollination - I can get a
few swarms for myself to start off my bee keeping on the cheap (i.e. not buying
them from WA or QLD - expensive and transport issues)
Such a swarm has given impetus
to this immediate need to start bee keeping. And it is this swarm I want to relocate to a hive from a toss-out old and
battered kitchen cupboard in a farmer’s junk heap - into something more
controllable - a wooden beehive that I can build.
But what type of hive will I build ???
Ancient or modern design??????,
Quadratic or Langstroth or other style ????,
Plastic, foam or wood or
other ????????
My family had many Langstroth hives when I grew up on a farm west of Canberra - with the bees feasting readily on Paterson's curse (Echium plantagineum) and clover which both covered our sheep property extensively.
The brother-in-law who also lives in the NT, has a few
hives also Langstroth style hives.
He had bought some
hives but needed more. Due to my job as a secondary materials technology and
design teacher, I have access to a complete woodwork workshop, so we used the table
saw, routers and other tools to make a heap of super boxes with some timber he
bought. He then bought a hundred plus frames and foundation.
This all gave me a taste for the hobby again. And the joy of making stuff with wood.
So I thought maybe I could make some NUCs to
get started at least and buy the rest
(A NUC is small box to hold a 4-6 Langstroth frames of brood
and honey - a baby bee hive in other words)
Frames, foundation and
more!!!!!! So many things to buy
However, major repairs to my
boat I fly fish out of put an end to buying anything! 45cm crack in hull near
keel than needed major re-welding - as in lots of $$$$
Add to this - timber in Darwin
is expensive - very expensive as it is all transported from southern more
temperate states. But as a teacher who does a lot of woodwork design classes -
I have access to a lot of scrap timber.
But you can’t build solid well-constructed
Langstroth hives from scrap timber. As the OCD characteristic in me would not
allow anything but an end product of high quality
So what to do??
search internet more..............
And while I love the concept of Flow
hives, the the price tag is not favourable for me currently
I continued to search the web and I come across
- Kenyan Top bar hives.
for a short overview see this video - top bar bee hive basics
Awesome - they tick so many boxes for my situation!
Also No exact mandatory measurements
needed (though I did make my top bars the same dimensions as the top piece of a
Langstroth bar if needed),
The Top Bar hives produces a bit of honey, lots of wax
So I watch every video on the
web I could find on top bar bee keeping
I read everything I can find
bout the subject - till facts, designs, figures and bees are constantly buzzing
my imagination
For me - the top bar hives
perfectly match my skills and my needs and my materials - and my "make it
yourself cheap-arse" nature
Another supportive idea for the
Top bar hive is that honey up here isn't the best
The honey up here is usually dark and
watery due to the tropical conditions - the taste is passable but..........
Now that quality and taste depends of course on
the flower and honey flow at the time - some honey can be the most gorgeous
caramel coloured and is awesomely tasty - but not all the time - with high chances of a half a comb
of dark and the other half honey comb light and tasty being a common occurrence
With most honey priced at $6 a kilo if ok but the
wax is 5 - 6 times that
Better still Top bar hives
produce much more beeswax due to the honey harvesting method needed for Top Bar combs
Perfect - well for me
So after a week of research and
learning - I refined a few designs drawings and got started to source materials
for making a few Top bar hives.
So here the journey begins
Feel free to follow along
Next blog entry will be the construction
of my first Top Bar hives.