Saturday 5 December 2020

Top feeder needed


So, the bees are struggling to get out of their hives with all this wet weather and the question arises – how are they feeding when rain keeps them indoors? Plus, during those rare moments of clear skies - I see heaps of bees on the lawn chasing grass pollen – this action by the bees in the past, usually means a dearth of other pollen and nectar sources.

I did place a sugar water mix out in middle of yards but only ants found it

So, an inhive feeder is needed. Another impetus is when I start revving up bees towards making some queens late January, I want them practiced with a top feeder, so plenty of brood available to create the cell builder hive.

First to research of pros and cons of the plethora of feeder types out there

There are very easy ‘pale’ or upside down bucket feeders but bees have to exit the hive to feed – and as wet season continues – difficult

There are frame feeders but they require main hive to be opened – which I want to avoid

Bees need to access but I don’t them drowning or exiting the hive that way. As too want ease of filling.

So the top feeder is the go as I can simply remove lid and pour  - minimal fuss

But the ones’s found online start at $20 and go up from there

Was going to make a CAD version and 3D print but need it larger than the printing platform I have.

So what to do – I spent a few weeks searching for the just the right tray which I could add a fitting to with a touch of clear silicone to increase water tight properties, heaps of videos and web pages that cover the reasons for this and that when it comes to feeders.

So with all my ideas rattling around in my head and a few sketches made - it realy came down to what I could get as cheap as possible - I started with a $4 tray from bunnings, criteria was to fit into one of my shallow supers I would convert to a feeder tray.

This conversion required the removal and storage of frames from the super - then some 3mm ply I had left over from other projects nailed and glued on bottom of box then five holes drilled – one in each corner for air flow and one in middle for bee access


To give the 3mm ply a bit more rigidity – I add in a 35x19 crossbar.

The vent holes in corners get a layer of fly screen, while hole in middle if for bees to access feeder.

some models research had access in corners for when hive not level - but mine are ensured to be level - so will avoid that extra complication and focus on just the one access point.

I couldn’t find just the right fitting so trimmed half of one part to ensure an almost flush level on bottom of base ply


A 46 mm hole drilled in base of plastic tray, add the silicone and screw together both parts– using a finger to touch up and smooth silicone after fitting is positioned


For the cover – I used a takeaway container with holes drilled in the highest edge 

To position the cover, I used hot glue gun to place some skewers in one layer in a position of three arms. Also a layer on this to keep cover in place .

I also glues some aluminium mesh on inside and outside of fitting to give bees a ladder type access.


And there you have it – just place on boxes and pour sugar water in top, bees have easy access to feed but not to me

Fits right on top of brood box or super - when required, however required but definitely the uppermost box 

Total cost - $4 tray and $3.20 for fitting– the rest what I already had around- that’s better than $20+ each of a pre-made one that might not even fit my homemade boxes. Took about 3 hours on a rainy arvo to build ten trays and adjust super boxes. Awesome!

we shall see how they go - update report to follow


Saturday 31 October 2020

Splits with Daughters help


While the rest of my family loves their sleep-ins on the weekends..............

.......(just dont understand it!).............

Thankfully, my youngest daughter wakes up early, crack of dawn, ready to go - like me -- and as not allowed electronic devices before lunch, she gets a bit toey early in the morning with no one else out of bed but me - i am usually in shed, or working with my show chooks, or in the vegy patch or working with the bees. if not the next things to occupy my time I am working on currently - aquaponics and bonsai


And this morning she said to me "can we do something with the bees?"

- why not, indeed!

All a Dad needs is an enthused child to pass on his "wisdom of life and the world" onto rather than as a captive audience or as my only son would say - "slave labour"


So the youngest daughter and I wiggled into our bee suits - quietly so as not to wake the sleeping dragon (Mum) and then headed off down the back of our block with the sun just creeping over the horizon to the east. We got the smoker working and then gloved up, hooded up, zipped up - we are ready to do some bee keeping. 


A bit of context and reasoning first about the work today ---


I have one last long TBH being used (10 of them unused in the shed) that was full of bees, brood and honey and I was going to split next week but with the youngest daughter's enthusiasm high, I was keen to take advantage of the situation (she hasn't been keen since getting her first bee sting through a glove 9 weeks ago)


I have been over the last few months taking splits out of my long Top Bar Hives (TBHs) placing them in the new Langstroth hives I made from scrap timber in July 2020 , with 7 out of 9 walk away splits having worked really well, all 7 producing their own queens, this from four - five frames of brood and honey placed in the new langstroth hives.


My longer TBHs have 30-32 top bars so are equivalent to 3 box high 10 frame langstroth hive, I have been getting 3-5 kilo of honey out of the TBH hives, however the method of extraction renders the comb not being able to be used again by the bees (crushed and squeezed), any brood is wasted too  - the used comb no use except for extracting the wax for other uses. 


So the reason for the change to the langstroth style hives from TBHs has been more honey wanted - in particular without brood being in the same comb. You can add a queen extruder into a TBH, placed vertically about 10 top bars in, rather than horizontally like in langstroth style hives between brood box and super box above, - but not why I originally made the TBHs which was for just the fun of keeping bees


However with personal and career timing influences, I am wanting to turn the bees into more of an income focus - with honey, honey in the comb wax, queens and NUCs the main products  


I still need the larger longer TBH as I feel they produce what I feel is the perfect comb for walk away splits (that is don’t need new queen purchases or raised) - filled with honey and brood all in a single frame, but eliminating my last two long TBHs is needed to help me shift the bees to a better location on my block. If moved long distance - TBHs don't travel well, as the comb is not fully supported on all sides, unlike a langstroth frame with all the comb surrounded by timber, a TBH frame only has timber at the top.


I have shifted hives across the block before - using the 'Place tree in front of hive in new location " method but alway a few forager bees that get lost - and a large longer TBH full of comb, honey, bees etc is super heavy and awkward to move about - and then add in the unstable comb issue - fraught with dangers. So taking splits out and leaving behind just a brood box in the original location was my solution for today. I will restart the longer TBH off (3-6 of them) from the three short TBH I now have once they mature


back to the real beekeeping action .......


So the daughter and I take the lid off TBH and start shifting top bars with hanging comb absolutely packed with bees, pollen, and honey. Some into the langstroth brood box I was going to put back in the location of the TBH but also into a couple of short TBHs (each hold 15 top bars). So with 8 or so top bars with comb in each box empty of frames and top bars added respectively.


There were no actions taken to find the queen, just even out the comb between the three boxes I had - then leave the langstroth where the long TBH was and take the two short TBHs over to new location - The foragers in the two short TBHs would return to original location but the nursery bees would remain with brood etc. Then as they mature and start foraging they would orientate themselves to this new location none the wiser - also hoping before that, that they will take a young fresh laid egg and turn it into their own new queen.


I had thought maybe I would get only one walk away split from the TBH this morning, as I had already taken out comb for two other walk away splits four weeks ago. But with the amount of comb and bees this morning in the long TBH I would need another box - so used two short TBH boxes instead of the one intended


We (well me as too heavy for a 7 year old) placed the short TBHs in the new area I had set aside for the racks to hold the bee hives. 


The middle hives are short TBHs, the far right a langstroth, the far left a flow hive base section
Number 9 was a walk away split from 4 days ago from my second last long TBH
Numbers 12 & 13 were from the work today by my daughter and I

Number 11 is a swarm I captured from a school in Marlow Lagoon, I think 2 weeks ago

The Flow hive base section you can see above - is a split I am attempting for a member of a FB group for Darwin beekeeping


Number 10 is the final product for todays efforts of transferring the TBH to Langstorth 

Number 2 is a split from two months ago, just added a shallow super due to hive numbers 

See the blue string at rear in gap on left - that was where one of the failed walk away splits was


We placed two shallow supers on the new langstroth brood box - not needed except for space for the older bees to settle into, that can be removed one in a week or so if needed, as you dont want too much free space in a hive.


The cloud of bees outside the new hive's entrance was intense - but given disruption and a hive that didn’t look like the old one - understandable.


Next weekend I will take the two hives above and two more, making four hives in total, currently not in ideal locations, to the inlaws farm out past Fogg Dam for a week or two and then bring them back to the new location on our block.


As we tidied up, I asked my littlest daughter how she went today, but she was unable to talk to me as she was intently talking to a little bee crawling around her gloved hand. Then after their conversation she gently placed it back on the hive, asking it to tell her family to relax, chill, and enjoy their new hive box.


What an awesome daughter I have!!!


Next on the game plan is to make 10 or so, 5 frame NUC boxes - which I intend to sell off to pay for all the hobbies I have that are draining my savings.  I have already used CAD software to create the 3D printable NUC entance. After that I want to make an attempt at some queens in the new year.

So exciting times ahead!


Monday 12 October 2020

Wild hive collection from Daughter's school

When picking up daughter from school monday afternoon, a teacher mentions a beehive was spotted during the day in the top of a tree

Now her husband is a bee keeper too, but was working rural till weekend and due to students already trying to kick soccer balls into the small hive at the top of the tree  - I suggest I grab the hive!

So had to chat to admin staff to ensure Ok with me grabbing it - but told had to wait til after school care students and staff left for the day - for saftey concerns

I then rushed the 25 minutes back to home to get all the gear I would need - I planned to climb tree take hive down in one peice and place in top half of a double hive. Bottom box with frames, top box with no frames so I could to place the removed hive as a whole in to it - then they could migrate into lower box - removing old comb in a couple of weeks - here's hoping.

My 10 year old daughter was super chuffed at being involved - and like a mini version of her mother had me orgnaized, nibble food sorted and as a priority got her bee suit and gloves ready to help me out

On arrival back at the school we placed all the equipment in all the right places and I climbed the tree 

I cut a few lower branches to ensure I could get the four or so combs out of the tree as a whole, this then to place in top of hive box with as little disturbance as possible


Then came the scary key limb sawing the one main branch with the hive was on 


- dont drop it!


I dropped the saw a couple of times but my helpers passed it back to me - saved me getting out of tree twice! thanks


Once I started lowering the hive attached to the limb - a problem - an unseen tip of a nearby limb was incorporated into the hive cause it to be damaged as I lowered it

First one comb falling to the ground, this followed by two more 

- bugger! 

       bugger 

                bugger!

Once I climbed down, I placed the comb pieces between frames and placed these in lower portion of the double hive 

Amazingly the bees were quite calm through all this disturbance

Bees were in clumps on the ground having fallen off the comb-  I delicately scooped up the bees and placed them in hive box as best I could

I placed the box entance right next to a large clump of nursery bees (given their size?) and hoped they would move into the hive attraced by the scent of the comb filled with capped larva


I luckily spotted the queen and her fat elongated butt in another clump of bees on the grass and quickly placed her in the hive - further encouragment for bees to go into the hive - after queen being found I placed lid on hive boxes and hoped.

I saw a large mass of bees were back up at top of tree on branch next to where the hive originally was before my interferance. might have to get them eventually - these would most likely be older foraging bees used to that spot high in the tree 

So thought to leave the hive there and come back an hour or two after dark once the rest had made their choice to use nice new hive or go back to their tree 

So back home for dinner and once family settled in for the night, I head back to pick up hive and hopefully all the bees had taken up residence in their new home.

On arrival, I saw a couple of guard bees out front hive entrance - couldn't see the clump of bees that had gone back to upper branch of tree. I took a quick look into the lid and saw a large mass of bees in the frames with fallen comb of larva etc. So looks like it had worked!

I placed tape over the entrance and secured hive to transport home. Once home, placed the newly filled hive boxes on the hive stand and removed the tape from the entrance, so that at first light the bees could reorientate themselves in their new location

Next day - an early look at hive showed bees reorientating at hive entrance. Will check for queen activity in a couple of weeks. Here's hoping!

At the school next day they found a smallish lump of bees in top of  tree again - about 300 - hopefully I still have queen in my hive box and those that are just left behind are just the older foraging bees that will eventaully disperse or die off with no hive (sad!) - might get my bee vacuum set up with extension tube and try to get them (???)

So the daughter took photos and video - was  a great help overall - thanks Bub!

I put together a video of her media work - hope you enjoy her commentary!


Friday 28 August 2020

Splits and more

So only six weeks since the last pillaging of combs of brood and honey to make three walk away splits - and the TBHs were again bursting and full of comb and honey and brood - so more splits

Earlier in the week I had finally finished the painting of the eleven angstorth style hives i made during school holidays - and my wife could have our carport back for her car. Man those end grains take up a heap of paint. 


I also had to quickly change the style of front entrance landing platform – previous version a bit flimsy

Also did some CAD designing and then 3D printed some hive entrances I could attach to the hives to close off hives during transport. the slide lid can be reversed to close off entrance.


First task once the bee suit was on and the smoker started was to transfer the old splits in shorter TBHs from 7 weeks ago into the eleven new Langstroth hives I had made recently.

To do this, I took two of my shallow super boxes, removed and stored the frames – then to place the two empty shallow boxes on top of the brood box – this to fit in the deeper TBH frames.

It was hoped (and expected) that the bees will migrate down into the brood box frames before adding a queen excluder between brood box and shallow boxes. The TBH frames can be removed for repeated use in splits and such back in to the older TBH boxes– and the shallow frames put back into the shallow boxes for honey collection

Well that’s the plan!

Of the three previous splits – two TBH boxes were absolutely full of brood and pollen, even a bit of new comb with the starting of honey being capped - so an active queen is present – but while she wasn’t seen a very active hive.

After transfer of placing the new box in the old box’s place – the bees where not entirely happy as – wrong shape and colour but eventually the foraging bees found their way in and adjusted by the evening


The one split that didn’t have a queen – was all old workers and heaps of honey but zero brood eggs, larva etc – will add a frame or two of eggs and nursery bees from the big TBHs asap to this one to give it another chance

My Brother-in-law and a mate of his are working on some queens so maybe might get one of those queens - if it happens and is timely for the hive

So two out of three walk aways succeed from last attempt – enthused me to try again

But only enough combs of honey, pollen and brood from the large TBHs for two attempts this time

Sat these two new splits away from other hives on another frame work of 40mm pipe. I used two of the new hives I made here again – so far not much going on but hope the ladies are making their new queen for me

Forgot to grease legs and by morning ginger ants were attempting a coup - Fixed that up right away

Will be 5-6 weeks before I check on these again


The big TBHs were a mess of cross comb and were totally agro at my shifting, moving and cutting frames  - those ladies were surely pissed off at me – really charging the net of my hood with a repeating “thunk” as they hit it.

During the process - got some honey and some comb for personal use – actually, I gave away most of it

Friday 10 July 2020

Making 11 langstroth hives out of scrap timber

So what do you do with an over supply of donated timber from a worksite to my school?

Some would see (most of my students!!) Too much effort to process and redirect to a functional use


o

 Over the last few weeks of holidays, I have had a more positive approach to the use of the timber

 But here is a short context and background before we put saw to timber

 My Top bar hives are doing well - mishaps and losses along the way, as usually, this bee game has its ups and downs

 Once.....

A fallen branch that becomes a bridge above the greased stand legs giving access to the hive by 1000s and 1000s of green ants

So disappointing to see almost half the hive dead or being torn apart with a green ant on each leg of the bees being "drawn and quartered". 

 Due to the high number of ants in the hive itself not just on and around it - I pulled apart the hive and transferred the brood and honey frames into a spare hive, regrease the legs and brush away all the ants above the greased legs - don’t know if this one would be saved.  

 This episode started me thinking about getting more serious with my hives, splitting more often, creating more hives - more intentionally (thus the need for more hives to fill with bees!)

 Then the mind starts ticking over when I see all this timber at school - far more than needed (if at all) for the limited work students do in size, qty and form since I stopped teaching woodwork to focus on teaching 3D design, Engineering and 3D printing. No more coffee tables for 38 students in a semester (just not enough storage area or truth be told "care factor" by students to strive for excellence - their words - "too much work and effort, why not buy it"! 5 didn’t complete their tables and another 5 didn't even bother to take their coffee table home once completed - pathetic really!)

 Another impetus for my recent woodworking activity with the second hand timber – was a recent splitting of my large TBHs that were full to over flowing with bees and honey - and a huge flowering of gum trees about to commence – was the limited honey harvested and the large number of people who wanted some of the limited liquid gold.

 Yes, if I hadn’t split hives and used the honey to feed the new splits there would have been more. But the down side of top bar hives is the brood that is usually in the centre of every frame if you don’t create a queen exclusion area. Which I haven’t done as honey is not the main reason I do TBHs. Rather just the plain enjoyment of keeping and watching the bees (except when being attacked by green ants!).

 So, to get more honey – I should go more commercial in my approach. Langstroth Hives is the best option based on what brother-in-law is doing locally and my internet research.

But expensive, to buy it is $350-450 for base, brood and 2 supers, then the frames at $1.70-3.00 each and 30 for a hive plus some spares, then the bees to go in – them – it all adds up to over $800-900– but I am not paying for brand new. Second hand is fraught with untold dangers – so that’s out too.

 If I make the Langstroth hives – I have the skills and access to some average equipment at school (not exactly precision perfect).

 Plus I am broke –well not broke broke but no money spare for nothing. Got to save $300 for upcoming fly fishing tournament. Plus, the girls are getting into horses more – so will need a horse of their own (uggghhhh!) eventually for barrel racing – I think! Still no boat to go fishing whenever, rather relying on a mate with a boat. I also need to replace my ute which is now over 10years old, done over 270000kms and is feeling its age through my abuse of it.

 All I was rich in was time during the school holidays and a pile of timber at the school.

plus I got to keep my mind ticking over - exploring, researching, surmising, calculating, optimising - the list goes on infinitum  on at least a couple of ideas at a time (the other one currently is expanding my bonsai collection significantly to a mini commercial basis)

 So during the last week of school I set about to design a way I could use the 1.6m long by 138mm x 36mm planks from packing material for glass sheets for an upgrade on a high rise building in town.

 I researched sizes and form of Langstroth hives, construction methods and processes – the key measurement was to ensure I could swap frames from my TBHs and my brothers-in-law commercial hives if needed.

 Paramount importance was everything had to conform to the planks I had available.

 So first it was multiple sketches and estimates – which way to cut, shape and form the plethora of pieces needed to construct the hives and the frames. Adding widths and saw cut waste widths to see how many pieces can fit it the timber if cut this way or another way.

 I then tested the theories, sketches and ideas by designing it on CAD software. Each part made and assembled. This highlighted issues and production plan changes. Some right back to the starting point.

Below is the shallow super end piece


below is the full assembly of all the parts - brood box, 3 supers lid, base and all the frames
even has a logo I can add once I get the CNC machine going
 

So with the measurements and cutting plan all sorted as too the most efficient concept of a construction plan – I head to the woodwork room

 With the number of planks needed calculated - the first task is to pull apart the planks and extract the countless four inch nail gun nails out of the timber.

 Using a short pry bar the short cross pieces are removed and the nails hammered back through the timber for the pry bar claw tip to pull out

Over 3 kilo of nails eventually were weighed that were removed from the timber –


Once the right amount of planks prepared – ensuring limited knots and twists in the still greenish timbers – the planks selected for the brood boxes were ripped on the table saw on one edge to prepare them to be glued together to create the depth needed for the side pieces

These were clamped together in pairs (but several on the one set of long sash clamps) once glue applied to the newly sawn edges and left over night


Then the cross cut drop saw was employed to cut all the lengths needed – for shallow frames ends, standard frame ends, top bars and ends bars. Then the sides and ends of the main boxes cut to size.


 Point of note:

While the brood box would be the usual Langstroth depth, due to the thickness of the planks for the boxes I was only going to make shallow super boxes. You see if I had of split the planks into two the timber would be only 16mm thick (plus I didn't have a table saw or other tool good enough to do this), so stayed with the 36mm thickness which in turn added weight the box itself – so having shallow supers reduced the amount of weight once filled with honey. This all being so, every choice has a consequence – so instead of two normal sized supers, I planned to have three shallow supers. The weight of the brood box doesn’t come into it as it is rarely moved once set up. (plan to have them 10 of these hives on a trailer that can be moved about – only exchanging shallow supers as required for honey harvesting)

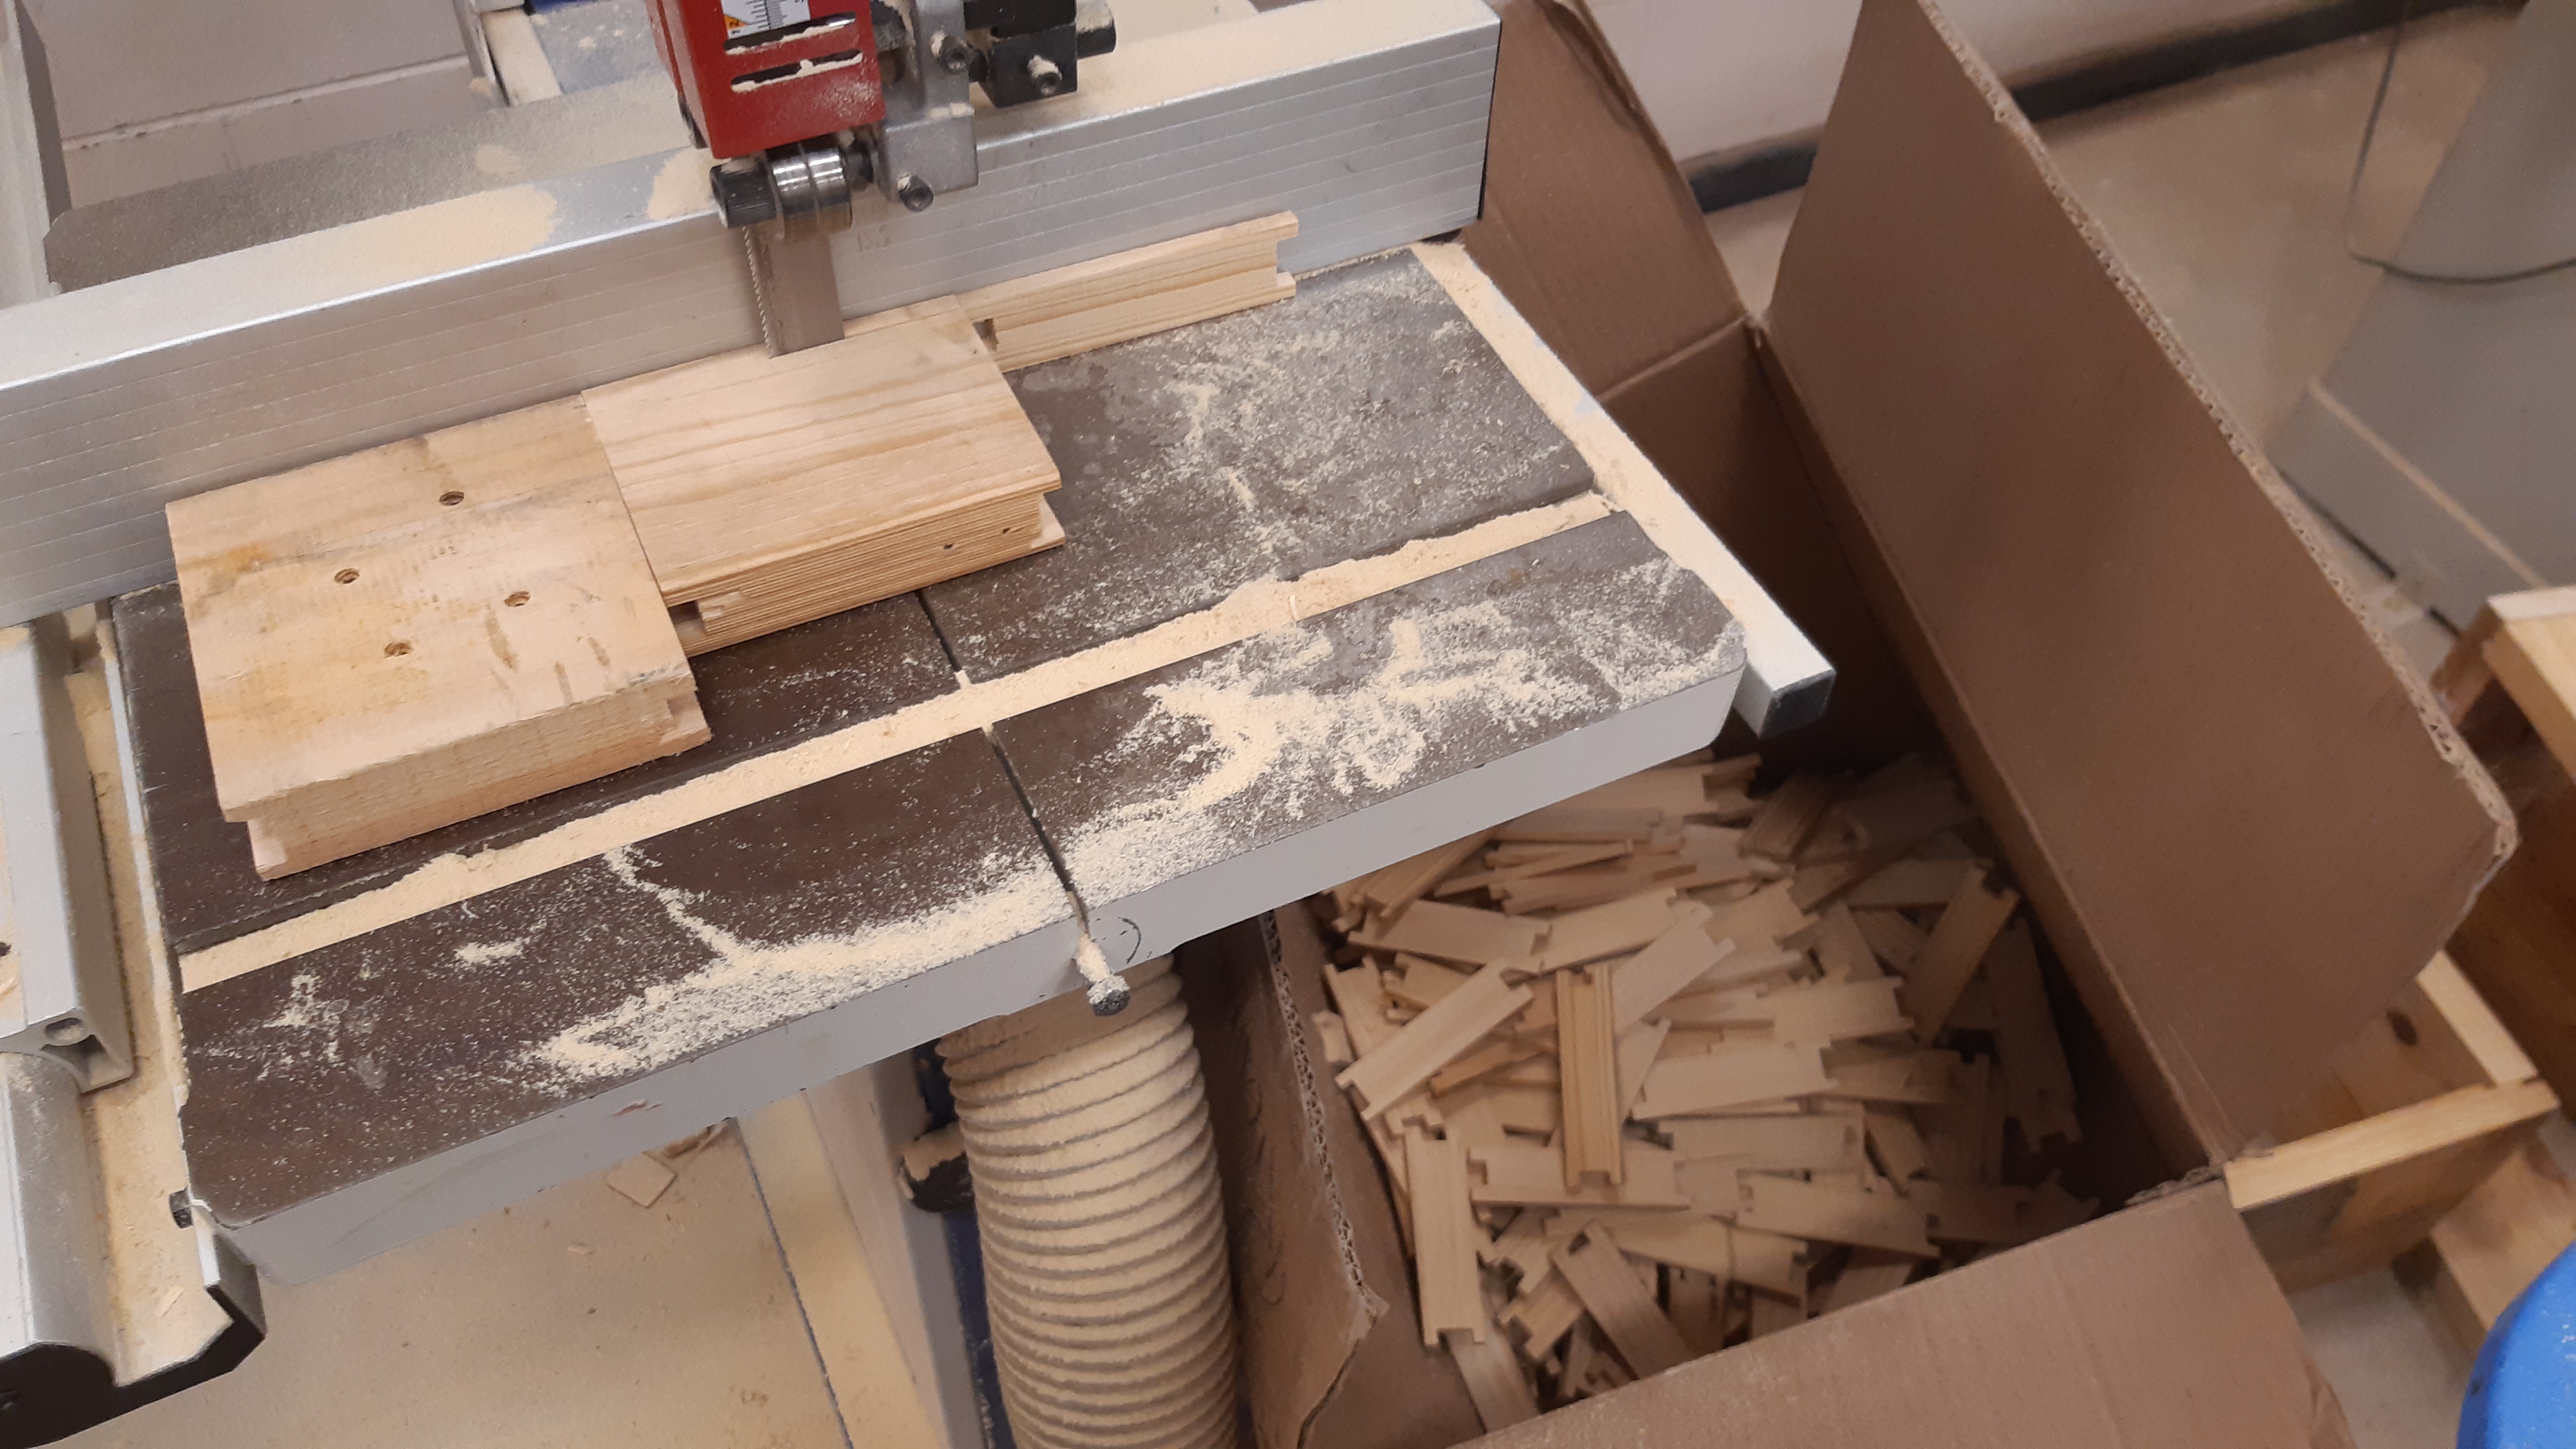
 Once everything cut to size to the quantities needed - the router table came into extensive use

 The two different lengths of pieces for end frames (90x at 130mm and 28x at 230mm) required a 16mm channel on bottom end grain and then a 22mm on the top end grain – these pieces were then cut 8 mm wide on a new blade in the big bandsaw (was going to use table saw but too small a length for table saw which would send the pieces flying if the table saw used). These pieces were again passed over the router, once on each side after a different set up done to take away the bee space that is needed between the frames.


 Below is the ends of the supers rebated for the ledge the honey frames would rest on and on ends where the other sides will join. no fancy dovetail joint but simple rebate, 

all sides now ready for assembly on a custom “box jig”

I made a box jig to ensure boxes square and easy to put together – made the task very efficient

glue in rebate, clamp both directios, 

then used a gas brad gun with skewed 50mm nails from two angles to re-enforce glue  

take out of jig and repeat 43 more times


Now comes the fiddly bits and lots of them – 11 boxes – one brood and 3 supers. That’s 40 frames per box. So that’s 440 frames – or 440 top bars, 440 bottom bars, plus deep ends and shallow ends – two per frame.- 880x - plus a heap of extras just incase.

next task was lots of cut passes on the table saw – so I spent five hours slicing up the 500 plus top bars - first into 8mm thick slices then pass through again at 27mm wide – the off cut of 5-6mm x 8mm would suit being the foundation lock strip – helpful byproduct!


 Then the bottom bars needed a similar task but with less time by half, with each 8mm (actually 9mm for bottom bars) cuts giving two bottom bars of 16mm, that could fit into first cut of the 36mm depth planks with a 4mm table saw cut up the middle – perfect!   But another pass over each of the bottom with the table saw was required to give a slot for the foundation (if used) to sit 


For this I need extra hands – so made a couple of jigs and got a mate to help me

We worked around each other to complete 500 frames (60 extras) over two days, but in less than a day overall time wise - place 10 in frame, add drop of glue, lay in bottom bar, use air gun to add a nail or two. flip this over, add drop of glue, place in top bar, use air gun to add a nail or two. pull out locking bars and transfer finished frames to a hive box. This was done 44 times and 6 more times for the spare frames.


Over the two weeks working a few hours most weekdays - we actually did about 5 or so 8 hours day overall

Which isn’t bad for 11 hives, worth a minimum of $400 each (yes plenty of flaws and twists but very usable)

Would not make the frames from scratch again with this timber – too green, too many twists and bends to compensate for, too much sap, too many knots in the pine to avoid impacting end result

The boxes are heavier but manageable -advantages are the thicker sides will insulate very well the sun warming the outside surfaces

But cheap timber is cheap timber, especially this cheap thus you live with the flaws or don't bother

 So every hive box had a full compliment of frames for each hive's brood and supers boxes plus an extra frames in case (30 deep, 30 shallow)

Now the frames need a bit more to be done – due to me going foundationless - this is not using a sheet of beeswax for bees to form comb out from in each frame.

For a 180-190 sheets of foundation is $450-490 plus freight – and given also the heat up here all that might arrive would be a 14kilo lump of beeswax - I need 400 plus frames so at least two lots of that 14kilo of foundation - keep in mind don't want to spend any money!

 So foundationless it is and leave the comb building entirely to the bees with some encouragement

To accomplish this now adding paddlepop sticks to top bar for bees to use as the start of their comb once I brush it with melted beeswax to encourage comb building


with appropriately drills holes just the right size - I also added two bamboo skewers from top to bottom evenly spaced along the top and bottom bars - that the comb will encase – this to hopefully enforce the comb when spinning off the honey – the spacing of the skewers still allows me to cut out honeycomb for containers rather then spin all the honey out

Still got bases and lids to make – another post on that soon

Then too the painting and the use

Then the whole idea for all this work can happen – harvest more honey!

Sunday 5 July 2020

20200705 - walk away splits

after 12 months of quiet - lost a few, saved a few 

but today................

Accomplished 3 walk away splits from my two big top bar hives this morning - hope they survive

Last split was doing well til sadly 1000s of green ants used a fallen branch as an access bridge to the hive and devastated the bees in the hive


Today, the big TB hives were very full of bees, brood and honey
Plenty of drone cell too, so preparing to swarm soon
So took a few frame of honey, some capped brood with nursery bees and eggs in cells to little top bar hives

This to see if the splits once they ralize no queen in hive - will take an egg and place in a super cell to.produce their own queen.

Will also stop potential swarming
The wind was up and along with my interference were not the happiest - hammering me regularly despite my bee suit

The big hives will fill up again with brood and honey real soon with the amount of pollen and nectar the field bees are bringing in plus the white gum tree flowers will b bursting forth real soon

While I put most of honey into the splits, I did manage to harvest 3 tubs of capped honeycomb and a small squeeze bottle 

Will need splits (& more) to go into the 10 new langstroth style hives I should finish next week - so here's hoping!