More than a year ago a swarm took up residence in an old kitchen cupboard thrown onto the farm junk pile
My in-laws who own the farm suggested I add the hive to my top bar hives - Yes please!!
Had to delay the transfer of this bee hive to a top bar hive due to picking of melons and so many workers going past the hive all day long
With the picking done and only two workers cleaning up the paddocks - my time had come
So with a very early start, I set up the bee vacuum connecting a couple of extension cords back along the farm road to the main shed. I stoked the smoker and then got into my bee suit.
I was going to go through the cupboard doors, but the top drawer the hive had started in wouldn't budge
Taking off the top of cupboard an old tyre and a box of junk I noticed the plywood that made up the top was separating. - awesome another access point. Worked out wonderfully (see video link below)
I started with the drawer, the comb would have been 10cm or so deep. Old comb, very dark comb from many uses by brood.
My style of holding the comb was different to most methods I researched - zip tied hair clips the most common.
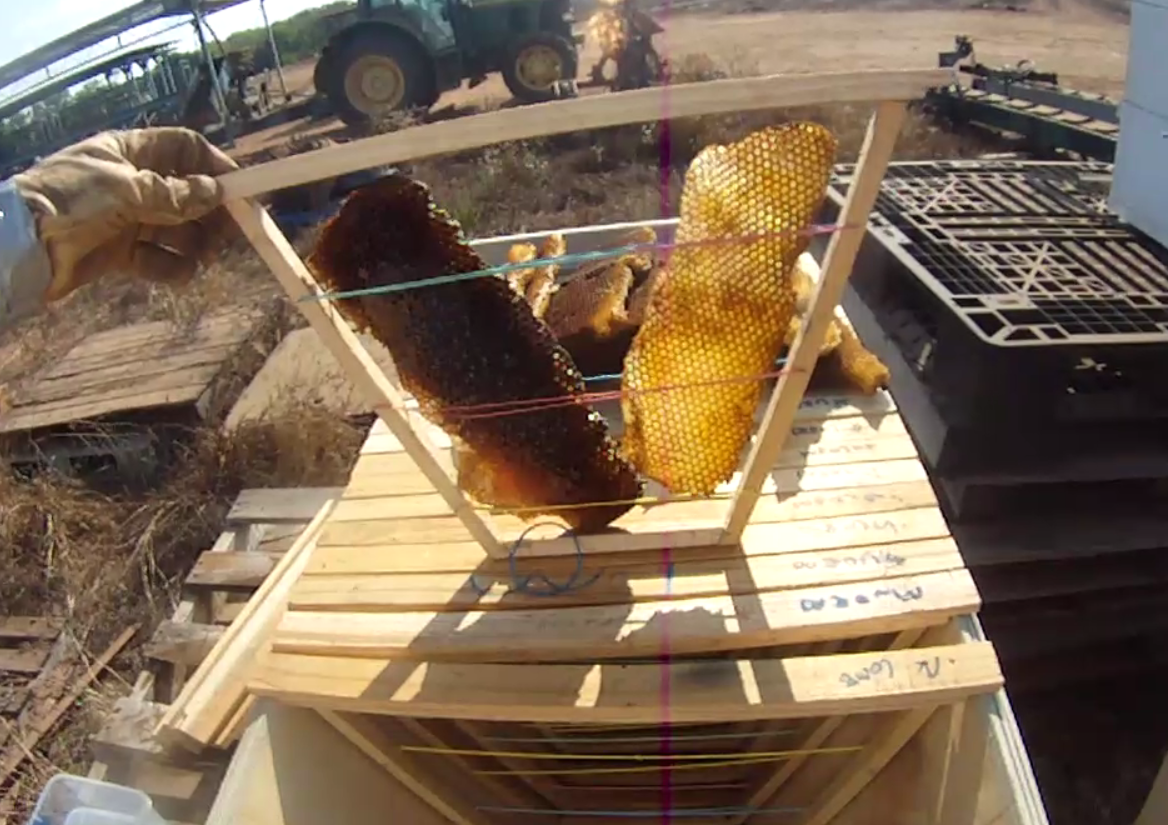
Instead I added a wooden frame then a few strategically placed small nails and would hold the comb in place with rubber bands
Will it work?? Time will tell. These cheap rubber bands don't weather well but hopefully last long enough until the bees secure the comb to the frames
The comb from the drawer were not deep enough

So I put two into a frame but each was only caught by one set of rubber bands and was too loose.
So put the drawer combs on an angle which was more secure - but would the bees like it??????
The larger comb from the middle of the cupboard fit much better

Every comb removed revealled more bees which I vacuumed up hoping I got the queen and she was not damaged in any way
Once all the comb removed I placed the best pieces of comb into the frames previously made for the top bar hive
I them made sure the opening for the top bar hive was in a position as close as possible to the kitchen cupboards main entrance point. I secured the top bar hive to the pallets under it with a few screws and eventually a tie down.
I removed half the top bars so the bee vacuum box base would fit into the far end of the top bar hive, with all the supported comb towards the front of the hive box
As soon as I switched off the vacuum, I removed the vacuum pipe and taped over the input hole so the bees could not escape. Then placed it in the hive and removed the tape over the prime hole so bees could move into the area with the combs. I taped up an holes and gapes around the vacuum box
I had taped over the entrance holes of the hive proper but there were so many bees flying about I took it off. A few bees inspected the top bar hive entrances. So removed the tape hoping the bees would stay - I feel my chances of success are high, but.............
So started about 7:30am and was done by 9am - except for a bit of clean up
Popping back tomorrow to check on the hive - update to follow soon.
Here is a video of the key bits of today's efforts
No comments:
Post a Comment