today............ 29/08/2022
Starting some beehives for honey and wax in Tropical conditions of the Darwin Rural Region of NT Australia - so thought the Top-Bar method might suit local conditions. This blog is about this journey.
Saturday, 27 August 2022
inspecting my 9 weakest hives
Helping another couple of Rural bee keepers
Had a few fun hours (4) today helping out some other Darwin rural beekeepers inspect 8 old hives today
Mother-in-law and Wife get invovled
August 1st 2022
Inspected a couple of hives at my inlaws property
today that are there to pollinate her vegy patch and take advantage of any
nectar in area (my place has nothing!!!)
Think the two hives are about to burst forth in
growth and activity
Lots of brood, lots of larva about to b capped
Found both queens - awesome! - so much easier when
they are marked
Found pollen, some honey stores - not bad for NUCs
moved into full sized boxes only a few weeks ago
My wife and mother-in-law got involved and
thoroughly enjoyed themselves - despite mother-in-law getting stung twice
(black gloves??)
Spreading the Hives - (and the love!)
August 04 2022
this particualr weekend, I was about shifting bees about the
rural area - 2 hives at a time to friends rural blocks
this to take advantage of the trees about to flower
if not already flowering near and on their rural blocks - seen Grevillia, some
paperback starting to go white, and though without much value towards bulk
honey production - have you seen a mango tree lately – almost ever single one
is absolutely fully loaded with flower
seems to be a sort of southern spring about to
happen in the Darwin rural area after the period of colder weather
still no signs of anything flower wise at my block
south of humptydoo, at lloyd creek. Two years ago at this time I could fill a
honey super at my block in a few weeks with great tasting honey from the woolly
butts and other bigger trees which hard carpets of fallen flowers around the
ground near them - but not this year.
but Girraween area, or Whitewood rd, or one block
of a friend who backs onto a waterway at Humptydoo – enough flowers for a
couple of hives amongst the rural 5 acre blocks
I am so keen to split all my hives with a double
brood box approach prior to the wet season - taking advantage of this apparent
"flow" that I feel is about to happen - here's hoping!
the People whose rural blocks I am placing hives on
- hope so too, as one hive split from the hives on their blocks - will be for
them with their hive boxes.
Just wish I had more hives, as I could do this on
at least ten more locations. I have no hives left at home after the hive
movements over the last few weeks.
Maybe next year! But maybe the eucalypts will
flower thickly next year, and I can keep all my hives at my block for hive bee
number growth and subsequent splitting!
Just a note:
Drop of a pair of hives at one location last
saturday morning round 8am. Set up stand, placed hives and opened the hive door
– bees orientate, and all is looking good.
But a phone call from block owner at 2pm to say –
green ants all over the hive tearing apart the bees
Bugger! Rookie mistake!!!!
Seems I forgot to grease up the legs of the hive
stand when setting up - so things such as green ants cannot climb up and into
the hives. (This stand didn’t have anti–ant cups etc I usually set up.)
Chaos and stress ensues !!! panic even!
With the bee gear still in the ute - I race over
(speed limits kept for sure!)
I arrive and suit up, as the bees are very much in
defence mode even though I there to help them!
I hose off the hive stands the marching countless
green ants, I brush off the hive entrance of the carpet of green ants all over
the entrance attacking the guard bees. So easy to see 6 plus green ants pulling
the guard bees apart. – not a nice way to go – drawn and quartered -
arrgggghhh!
I clean up a few ant stragglers - wiping them off
by a gloved hand, I profusely grease the hive stand legs - I also once ants
dispersed - open up the hives and wonderfully, no green ants inside the hives!
So lucky the green ants hadn’t got fully into the
invasion mode of the hives. The bees should be ok now.
Lesson re-enforced – prepare properly, expect the
unexpected.
No photos sorry – it was all a bit of a rush and I
totally forgot to take photos!
But still thought I would share.
Sunday, 3 April 2022
emergency swarm box idea
Got a message on Facebook from a guy I had sold some chicken pullets to a while back, this wondering if I knew anything about bees. He might have seen all the bee hives around and under the eaves my chicken coop .
I said "yep! that while still learning, I had enough knowledge to get me into mischief - as I am hoping to retire from the 9-5 in the next
couple of years to do bees full-time".
“What do you need?” I asked
Seems he had a bee swarm taken up residence in a boat on his
rural property. He would like to keep them for pollinating fruit trees on his block
Further questioning identified – no bee suit, no gear, no hive box. But
could I help?
Well yes – but all my boxes are currently tied up in
splitting and pollination services etc
(soooooo need to make some more hive boxes, buy more frames etc - and I mean real soon!)
Let me think about it – which worked out well given he was working elsewhere and wouldn’t be about for a week or so which gives me time to find a solution
The solution came in form of a foam broccoli box (grabbed 6 of them 12months ago and they had sat in my shed since – yeah the bees
will eventually chew it out but perfect for short term until he can get a better
box etc
So with my dabbling into CAD and 3D printing – I quickly designed some ventilation pods and an entrance with a landing platform that could be closed if needed – even with a queen excluder on entrance maybe.
Using calipers I measured the thickness of the wall of foam box and adjusted the design to suit making the wall thickness a constant in the CAD software - easy as!
The plan would be to get hive into this emergency box by putting any comb from boat into the frames in the emergency box. Then place it near entrance that bees were using to get into the boat - till they get use to temp hive box. then transfer location of boat - tranfer bees int oproper hive box etc.
Once parts designed and 3D printed, the box was marked and
then the holes to right size cut out. put front vents down low and another pair on back but up high to help with air flow.
Results looks good, standard frames fit in well with a touch
of wriggle room for bees
Thursday, 17 March 2022
So slack lately with posts but four splits done today
So, a lot has happened since last
post
Forgive my slackness – work life
& personal life too stressed last 2 years.
During which from a bee keeping perspective -
I lost hives,
I found and cuaght swarms,
and I lost more hives
Focused on building numbers
again
Got to change my career to bees
full time. Well once I have enough hives (250-300 is the plan)
So, I made some more brood boxes
from left over scrap timber from last box building spree. Now hoping
pollination fees for current hives can help me buy 200x hot waxed and painted
super boxes, 2200x wood framed plastic waxed foundation, 100x NUPLAS bits (vented
bases, 10 frame feeders and lids)
that’s about 30k plus freight needed
- uugghh that hurts!! But its is what it takes to get the hive numbers up
without anymore free timber to make my own
Been helping on occasional
weekends with a commercial keeper 3hours south of Darwin - super hot conditions
but heaps and heaps of learning.
While there last time, due to
the flowering about to happen in area, after inspection of 150 hives and
prepping 60 more for pollination services (60 already on site), we added more
than 350 ideal sized supers to hives. Every hive not going to pollination had
two or three supers (a few four ideals high) in anticipation of massive flow
about to happen.
Then this weekend.......
While I wasn't planning as of
yesterday to do the following but this Sunday I was bored so......
So did 4x walk away splits on
four of my hives this morning. I was for these four hives for the last few
weeks - feeding syrup and finally this Sunday the high quantity of bees, brood
and then a few capped drone cells prompted me to get at it rather than wait
another week
Several weeks ago, in
anticipation of this scenario, I added an extra 10 frame brood box to each of
these hives when the bees were hanging out front each evening with so many bees
in each hive - huge beards of them.
Back then I took four frames of
brood from original brood box and put in middle of new brood box - arranging
empty frames around the brood frames in both brood boxes creating a brood
chamber in centre of the combined two brood boxes
I also due to scarcity of a
honey flow - heavily substituted food in a feeder box on top of each hive -
sugar syrup - that the ladies have been emptying from the feeders almost as
soon as I top them up (every two days topping up current plan)
So, creating an artificial boom
flow for each hive
They have also been collecting
heaps of pollen, I assume from native long grass in the area surrounding our block
(but not much if any nectar stores seen in combs)
Now today with at least 6 very
full brood frames in each brood box, hopes are high.
That’s 8 brood boxes in total -
so 48 frames of brood. All hives would be bursting at box joints very soon if I
didn’t split
Heaps and heaps of capped brood
- these are my most prolific and gentle queens that I have - why I used them
for this double brood box for split trial
Also, with a few spots on
corner of some brood frames of drone cells - it is perfect time to split before
they swarm
When rebuilding chook shed recently,
I extended roof out from chook shed 1.5m to use for a bee lean-to type shelter
- less rain & sun on hives - tropical wet season are very very hard on the boxes and the bees in them
So had a spot ready for the
splits here next to chook shed
A stand was shifted into this
new location, 4 more bases and lids - as too for each hive - a feeder box and
an ideal super (space for when all that brood hatches)
Without searching for queen - I
took one of brood boxes to new location placing on bottom board, adding super
and feeder and lid
Repeated this for each of the
four hives I had been preparing
Whichever box has queen will keep doing what it was doing. While the queenless box will make some queens from recently laid eggs - hopefully anyway, and if a new queen makes it back from mating flight (lots of dragon flies around currently) a successful walk away split accomplished.
An inspection in a few weeks
will tell me which brood box has retained the original queen. If a new queen
not showing signs of existence, can add a frame of eggs and brood from a brood
box with a queen to try again to get a queen made
With more hives the plan this
year - also making up some more frames to do it all over again in 8-10 weeks
this time with 8 double brood box hives - have sooooo learned from past
mistakes (still learning too)
Hoping too - a honey flow
starts now wet season almost done
Would love to harvest some
honey (keep using honey frames in splits)
If I can get and keep hive
numbers up - keen for some small scale queen raising later in year - that will be
heaps fun!
Need to 3D print some more hive
doors and syrup feeders this week too.
Side note: I was short 4x 3D
printed feeders for the splits so used the zip lock bag method for feeding
syrup
Sugar syrup in zip lock bag
(freezer type strongest) - half fill, lay on top of frames under lid punch
a few holes on topside of bag with bamboo skewer. This in middle area, on this
I placed a large metal nut - sags in middle and syrup doesn’t run out. Bees don’t
mind it at all.
Sunday, 1 August 2021
Finally, some more action
Just a few thoughts and sharing of ideas and efforts of today.
Currently, I have been focusing on expanding my hive numbers – very furiously!!
14 days ago - I took a queen away from a hive with a frame or two of capped brood into a spare NUC and took it to second property to settle in to new location. The original hive would be queenless with hopefully a heap of fresh eggs to make into queens.
Yesterday in a few minutes before i went fishing inspected the original now queenless hive - found they had made ten queen cells on two frames. Took one frame with 3 queen cells and two more brood frames in another NUC to shift to alternate location. Leaving original hive to finish off the other queen cells it has, and first queen to hatch out to Regicide its fellow princesses before they hatch.
I have been making my own brood boxes out of free timber from a city work site that protected new window glass for a high rise - most are 2mx 330mmx 36mm. Am up to 30 brood boxes made - with enough timber for another 50 before I run out of the free timber – while not the best timber – being free and still manageable, I do feel very lucky to have it. Gives me something to do on weekends anyway.
The focus has been Langstroth boxes and frames (also 1200 frames made by hand from scratch with same timber last year - now all in use), before now starting to buy the unassembled frames and put in those waxed plastic foundation to go in the brood boxes.
My supers are shallow “ideals” in size because the timber walls of boxes is 36mm thick due to the timber I got I for free being that size. So the 'honey super' size is also better for lifting when full of honey
Not that I am harvesting honey – as food resources get shared amongst the splits and such (much to wife's chargin who loves honey in the comb). And my focus is making as many brood focused hives I can, then making more brood hives - honey can come later. the goal is 250 hives - to be my own boss!making my own grafted queens, NUCs and hives
Having said all this I started my bee keeping with Top Bar Hives.
However, steered away from them due to the difficulty of shifting them and the potential damage to comb by the shifting.
I also wanted to swap frames between the Top Bar and Langstroth hives.
The story is getting long……….
For now my full time income job that pays the bills and buys me more bee equipment - is as a Design teacher focusing on CAD and 3D printing. And with thirty or so top bar hives sitting idle (built with student help at my last school)– I used my knowledge and tech skills and equipment to work out a solution to making the Top Bar Hives more movable.
Most of my Top bar hives are 15 frames deep (16 of them), but I had 10 more that are 32 frames deep. Made never intending to move them – bees at the time were an enjoyable hobby, I now want to be a my main income sourceas i move towards retirement.
I cut the 32 frame deep top bar hives in half and added new ends – this to make easier to lift and move - two hives from one.
Then using CAD software I designed connectors to to add side bars and a bottom bar to the Top Bar timber the bees build their comb down from. to create a full frame to support the comb they build.
the images attached are the result.
basically i designed, then 3D printed a connector rather than the weakness of a wood on wood joint of thin timber peices that would be weak also given the angles needed for a sloping sided top bar hive - not 100% strong. The connector also adds spacing advantage with width of connector.
This could have be done many ways, better ways even - but this one uses the skills I have, the gear I had, and I had fun working out the problems etc along the way
We shall see how it all works out.
Saturday, 5 December 2020
Top feeder needed
So, the bees are struggling to get out of their hives with all
this wet weather and the question arises – how are they feeding when rain keeps
them indoors? Plus, during those rare moments of clear skies - I see heaps of
bees on the lawn chasing grass pollen – this action by the bees in the past, usually
means a dearth of other pollen and nectar sources.
I did place a sugar water mix out in middle of yards but
only ants found it
So, an inhive feeder is needed. Another impetus is when I start
revving up bees towards making some queens late January, I want them practiced
with a top feeder, so plenty of brood available to create the cell builder
hive.
First to research of pros and cons of the plethora of feeder
types out there
There are very easy ‘pale’ or upside down bucket feeders but
bees have to exit the hive to feed – and as wet season continues – difficult
There are frame feeders but they require main hive to be opened –
which I want to avoid
Bees need to access but I don’t them drowning or exiting the
hive that way. As too want ease of filling.
So the top feeder is the go as I can simply remove lid and pour - minimal fuss
But the ones’s found online start at $20 and go up from
there
Was going to make a CAD version and 3D print but need it
larger than the printing platform I have.
So what to do – I spent a few weeks searching for the just the
right tray which I could add a fitting to with a touch of clear silicone to
increase water tight properties, heaps of videos and web pages that cover the reasons for this and that when it comes to feeders.
So with all my ideas rattling around in my head and a few sketches made - it realy came down to what I could get as cheap as possible - I started with a $4 tray from bunnings, criteria was to fit
into one of my shallow supers I would convert to a feeder tray.
This conversion required the removal and storage of frames from the super - then some 3mm ply I had left over from other projects nailed and glued on bottom of box then five holes drilled – one in each corner for air flow and one in middle for bee access
To give the 3mm ply a bit more rigidity – I add in a 35x19 crossbar.
The vent holes in corners get a layer of fly screen, while
hole in middle if for bees to access feeder.
some models research had access in corners for when hive not level - but mine are ensured to be level - so will avoid that extra complication and focus on just the one access point.
I couldn’t find just the right fitting so trimmed half of
one part to ensure an almost flush level on bottom of base ply
A 46 mm hole drilled in base of plastic tray, add the silicone and
screw together both parts– using a finger to touch up and smooth silicone after fitting is positioned
I also glues some aluminium mesh on inside and outside of
fitting to give bees a ladder type access.
And there you have it – just place on boxes and pour sugar water in top, bees have easy access to feed but
not to me
Fits right on top of brood box or super - when required, however required but definitely the uppermost box
Total cost - $4 tray and $3.20 for fitting– the rest what I already
had around- that’s better than $20+ each of a pre-made one that might not even fit my homemade boxes. Took about 3 hours on a rainy arvo to
build ten trays and adjust super boxes. Awesome!
Saturday, 31 October 2020
Splits with Daughters help
While the rest of my family loves their sleep-ins on the weekends..............
.......(just dont understand it!).............
Thankfully, my youngest daughter wakes up early, crack of dawn, ready to go - like me -- and as not allowed electronic devices before lunch, she gets a bit toey early in the morning with no one else out of bed but me - i am usually in shed, or working with my show chooks, or in the vegy patch or working with the bees. if not the next things to occupy my time I am working on currently - aquaponics and bonsai
And this morning she said to me "can we do something with the bees?"
- why not, indeed!
All a Dad needs is an enthused child to pass on his "wisdom of life and the world" onto rather than as a captive audience or as my only son would say - "slave labour"
So the youngest daughter and I wiggled into our bee suits - quietly so as not to wake the sleeping dragon (Mum) and then headed off down the back of our block with the sun just creeping over the horizon to the east. We got the smoker working and then gloved up, hooded up, zipped up - we are ready to do some bee keeping.
A bit of context and reasoning first about the work today ---
I have one last long TBH being used (10 of them unused in the shed) that was full of bees, brood and honey and I was going to split next week but with the youngest daughter's enthusiasm high, I was keen to take advantage of the situation (she hasn't been keen since getting her first bee sting through a glove 9 weeks ago)
I have been over the last few months taking splits out of my long Top Bar Hives (TBHs) placing them in the new Langstroth hives I made from scrap timber in July 2020 , with 7 out of 9 walk away splits having worked really well, all 7 producing their own queens, this from four - five frames of brood and honey placed in the new langstroth hives.
My longer TBHs have 30-32 top bars so are equivalent to 3 box high 10 frame langstroth hive, I have been getting 3-5 kilo of honey out of the TBH hives, however the method of extraction renders the comb not being able to be used again by the bees (crushed and squeezed), any brood is wasted too - the used comb no use except for extracting the wax for other uses.
So the reason for the change to the langstroth style hives from TBHs has been more honey wanted - in particular without brood being in the same comb. You can add a queen extruder into a TBH, placed vertically about 10 top bars in, rather than horizontally like in langstroth style hives between brood box and super box above, - but not why I originally made the TBHs which was for just the fun of keeping bees
However with personal and career timing influences, I am wanting to turn the bees into more of an income focus - with honey, honey in the comb wax, queens and NUCs the main products
I still need the larger longer TBH as I feel they produce what I feel is the perfect comb for walk away splits (that is don’t need new queen purchases or raised) - filled with honey and brood all in a single frame, but eliminating my last two long TBHs is needed to help me shift the bees to a better location on my block. If moved long distance - TBHs don't travel well, as the comb is not fully supported on all sides, unlike a langstroth frame with all the comb surrounded by timber, a TBH frame only has timber at the top.
I have shifted hives across the block before - using the 'Place tree in front of hive in new location " method but alway a few forager bees that get lost - and a large longer TBH full of comb, honey, bees etc is super heavy and awkward to move about - and then add in the unstable comb issue - fraught with dangers. So taking splits out and leaving behind just a brood box in the original location was my solution for today. I will restart the longer TBH off (3-6 of them) from the three short TBH I now have once they mature
back to the real beekeeping action .......
So the daughter and I take the lid off TBH and start shifting top bars with hanging comb absolutely packed with bees, pollen, and honey. Some into the langstroth brood box I was going to put back in the location of the TBH but also into a couple of short TBHs (each hold 15 top bars). So with 8 or so top bars with comb in each box empty of frames and top bars added respectively.
There were no actions taken to find the queen, just even out the comb between the three boxes I had - then leave the langstroth where the long TBH was and take the two short TBHs over to new location - The foragers in the two short TBHs would return to original location but the nursery bees would remain with brood etc. Then as they mature and start foraging they would orientate themselves to this new location none the wiser - also hoping before that, that they will take a young fresh laid egg and turn it into their own new queen.
I had thought maybe I would get only one walk away split from the TBH this morning, as I had already taken out comb for two other walk away splits four weeks ago. But with the amount of comb and bees this morning in the long TBH I would need another box - so used two short TBH boxes instead of the one intended
We (well me as too heavy for a 7 year old) placed the short TBHs in the new area I had set aside for the racks to hold the bee hives.
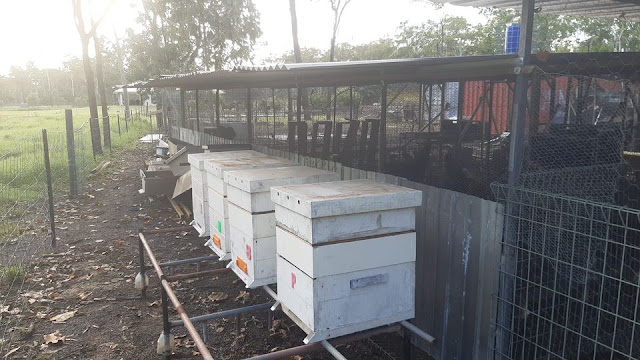
The middle hives are short TBHs, the far right a langstroth, the far left a flow hive base section
Number 11 is a swarm I captured from a school in Marlow Lagoon, I think 2 weeks ago
The Flow hive base section you can see above - is a split I am attempting for a member of a FB group for Darwin beekeeping
Number 10 is the final product for todays efforts of transferring the TBH to Langstorth
Number 2 is a split from two months ago, just added a shallow super due to hive numbers
See the blue string at rear in gap on left - that was where one of the failed walk away splits was
We placed two shallow supers on the new langstroth brood box - not needed except for space for the older bees to settle into, that can be removed one in a week or so if needed, as you dont want too much free space in a hive.
The cloud of bees outside the new hive's entrance was intense - but given disruption and a hive that didn’t look like the old one - understandable.
Next weekend I will take the two hives above and two more, making four hives in total, currently not in ideal locations, to the inlaws farm out past Fogg Dam for a week or two and then bring them back to the new location on our block.
As we tidied up, I asked my littlest daughter how she went today, but she was unable to talk to me as she was intently talking to a little bee crawling around her gloved hand. Then after their conversation she gently placed it back on the hive, asking it to tell her family to relax, chill, and enjoy their new hive box.
What an awesome daughter I have!!!
Next on the game plan is to make 10 or so, 5 frame NUC boxes - which I intend to sell off to pay for all the hobbies I have that are draining my savings. I have already used CAD software to create the 3D printable NUC entance. After that I want to make an attempt at some queens in the new year.
So exciting times ahead!